why-your-kenmore-freezer-leaks-water-and-how-to-stop-it

Why Your Kenmore Freezer Leaks Water And How To Stop It

Welcome to TheKitchenApplianceDad.com, where we dive deep into common household appliance issues and provide you with expert tips to solve them efficiently. Today, we’re focusing on a common problem many Kenmore freezer owners face: water leakage. Understanding why your Kenore freezer is leaking water and knowing how to stop it can save you from potential damage and unnecessary stress.

Understanding the Causes of Water Leakage in Your Kenmore Freezer

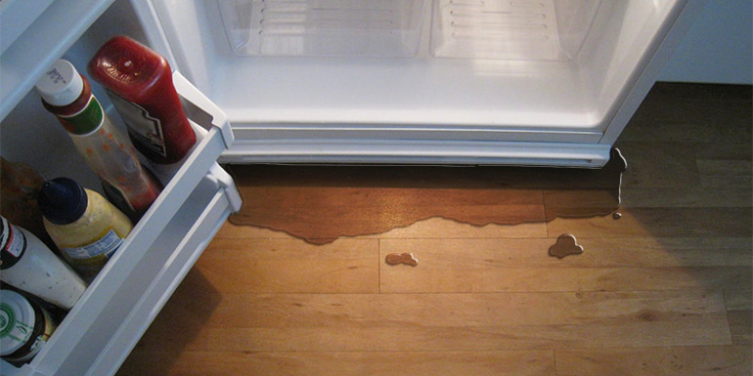
Water leakage in freezers is not only a nuisance but can also be a symptom of underlying issues that might need immediate attention. Let’s explore some of the most common causes:

Why Does My Refrigerator Leak Water?

Defrost Drain Problems

The defrost drain is a crucial component in your freezer that allows water to drain out during the defrost cycle. If this drain is clogged with ice or debris, water can start to leak out of your freezer. This is one of the most frequent causes of water leakage in Kenmore freezers.

Faulty or Damaged Door Seals

The door seals, or gaskets, of your freezer are designed to keep the cold air in and the warm air out. Over time, these seals can wear out or become damaged, resulting in condensation and moisture buildup that may lead to water leakage.

Improper Tilting

If your freezer isn’t level, it can cause improper drainage during the defrost cycle, leading to water leakage. The freezer should be slightly tilted backward to ensure that the water drains correctly.

Ice Maker Issues

If your Kenmore freezer comes with an ice maker, problems in the ice maker’s water line connection can be another source of leakage. This could be due to a loose connection or a crack in the line.

How To Stop Water Leakage in Your Kenmore Freezer

Now that we understand the potential causes, let’s look at the steps to fix this issue. Here are detailed instructions to help you stop your Kenmore freezer from leaking water:

Unclog the Defrost Drain

  1. Unplug Your Freezer: Safety first! Make sure to unplug the freezer to avoid any electrical hazards.
  2. Locate the Defrost Drain: Typically, the drain is located at the back of the freezer compartment. Refer to your Kenmore user manual if you have trouble finding it.
  3. Thaw Any Ice: Use a hairdryer (carefully) or warm water to melt any ice that may be clogging the drain.
  4. Clear the Drain: Use a small drain snake or a stiff wire to gently poke through the drain and clear any obstructions.
  5. Flush with Warm Water: Ensure the drain is clear by flushing it with warm water using a turkey baster or a small funnel.

Replace or Repair Door Seals

  1. Inspect the Seals: Check the seals around the door for any signs of wear or damage. Look for cracks or areas where the seal might not be adhering properly to the door frame.
  2. Clean the Seals: Sometimes, simply cleaning the seals with warm soapy water and drying them can improve their efficiency.
  3. Replace if Necessary: If the seals are damaged, replace them. You can purchase new seals from Kenmore or a reputable appliance parts retailer.

Level Your Freezer

  1. Use a Level: Place a level on top of the freezer to check if it’s tilting forward.
  2. Adjust the Legs: Most freezers come with adjustable front legs. Turn these legs clockwise or counterclockwise until the freezer is slightly tilted backward.

Check and Fix the Ice Maker

  1. Inspect the Water Line: Look for any signs of leakage or damage in the water line connected to the ice maker.
  2. Tighten Connections: Use a wrench to tighten any loose connections.
  3. Replace if Necessary: If the water line is damaged, it’s best to replace it to prevent future leaks.

Preventive Maintenance

To prevent future leaks, regularly check and clean your freezer’s defrost drain and door seals. Additionally, keep an eye on the ice maker and ensure your freezer is always correctly leveled. Regular maintenance not only helps in preventing leaks but also extends the life of your appliance.

Conclusion

Dealing with a leaking Kenmore freezer can be frustrating, but most causes are easily diagnosable and fixable. By following the steps outlined above, you can quickly get your freezer back to its optimal condition and prevent future incidents.

Key Takeaways

  • Check the Defrost Drain: Regularly ensure it is not clogged to prevent water leakage.
  • Inspect and Maintain Door Seals: Damaged or worn-out seals are a common cause of leaks.
  • Ensure Proper Freezer Leveling: An improperly leveled freezer can lead to drainage issues.
  • Monitor the Ice Maker: Keep an eye on the ice maker’s water line for any signs of leakage or damage.

At TheKitchenApplianceDad.com, we’re dedicated to helping you keep your kitchen appliances in top shape. Remember, a little maintenance goes a long way in ensuring the longevity and efficiency of your appliances. Happy fixing!

Meet

Dale

Hi, I'm Dale! With over ten years in high volume restaurants, my journey has taken me through the ins and outs of using, maintaining, and even repairing virtually every kitchen appliance imaginable.

I'm here to share simple, straightforward advice to help you choose and use your kitchen tools effectively. No fluff, just the essential info you need to cook up a storm.