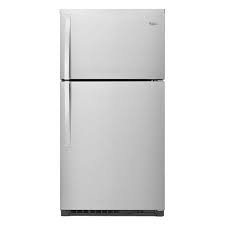
When your Whirlpool refrigerator’s freezer starts leaking water, it can be more than just a minor inconvenience. This issue often points to a clogged drain tube, a common problem that can lead to ice buildup and even water damage to your kitchen floor if left unchecked. Fortunately, unclogging the freezer drain tube is a manageable task that you can do yourself with a few tools and some patience. Today at TheKitchenApplianceDad.com, we’re going to guide you through the steps to fix this issue efficiently.
Before diving into the fix, it’s crucial to understand what causes the drain tube in your freezer to clog. In most Whirlpool refrigerators, the defrost drain can become clogged with ice or food particles, preventing water that accumulates during the defrost cycle from draining away from the freezer. Instead, this water backs up, leading to leaks and ice accumulation.

Always prioritize safety when working on electrical appliances. Unplug your Whirlpool refrigerator from the power outlet to avoid any electrical hazards.
Take out all food items from the freezer. You might need a cooler to store your frozen goods temporarily. This step ensures you have ample space to work and protects your food from thawing out.
The drain hole is usually located at the back or bottom of the freezer compartment. You might need to remove the freezer’s back panel or floor to access it. Use the screwdriver if necessary.
If there’s visible ice blocking the drain, carefully melt it using a hairdryer or heat gun. Be sure to set the device on a low heat setting to avoid damaging the freezer’s interior. Alternatively, you can use hot water to melt the ice.
Once the ice is cleared, use a turkey baster or small funnel to flush hot water down the drain tube. This helps to melt any remaining ice and push through minor clogs. For tougher blockages, gently insert a pipe cleaner or flexible wire to remove debris.
For a thorough cleaning, you can pour a mixture of 1/4 cup of baking soda followed by 1/2 cup of vinegar down the drain. This mixture will fizz and bubble, helping to break down any remaining residue within the drain. Flush with hot water after the fizzing stops.
Dry any water spilled during the process with a towel or sponge. Reassemble any components you had to remove, ensuring everything is back in its proper place.
Once everything is set, plug your refrigerator back into the power outlet. Monitor the freezer over the next few hours to ensure that the issue is resolved and that water is draining properly.
To prevent future clogs in your freezer’s drain tube:
Dealing with a clogged freezer drain tube can be a hassle, but with the right tools and a bit of know-how, it’s a problem that you can fix on your own. Not only does this save you money on a service call, but it also keeps your Whirlpool refrigerator running efficiently, reducing the risk offuture leaks and maintenance issues. If you find that the problem persists even after you’ve gone through these steps, it may be wise to consult a professional technician to inspect your appliance. Remember, regular upkeep is the key to prolonging the life of your kitchen appliances.
Thank you for tuning into TheKitchenApplianceDad.com for your home appliance solutions. Be sure to check back for more tips, tricks, and advice on keeping your kitchen running smoothly!

