Welcome to another detailed guide from TheKitchenApplianceDad.com, where we dive deep into kitchen appliances to help you make the most of your home devices. Today, we’re focusing on an often overlooked but crucial component of the Whirlpool refrigerator: the freezer fan. This component is essential for maintaining the proper temperature and airflow in your freezer, ensuring that your food stays fresh and your appliance runs efficiently.
The freezer fan, technically known as the evaporator fan, is responsible for circulating cold air from the coils through the freezer and refrigerator compartments. This circulation is vital because it helps in cooling down the stored items evenly and maintains a consistent temperature throughout the appliance.
Before we jump into the costs and replacement procedure, it’s important to recognize the signs that might indicate a failing freezer fan:

The cost of a Whirlpool freezer fan can vary based on the model and where you purchase it from. Generally, you can expect to spend between $35 and $100 for a new fan. OEM (Original Equipment Manufacturer) parts tend to be on the higher end of this range but are recommended for their reliability and compatibility.
For instance, shopping from reputable sources like Whirlpool’s official parts website or trusted retailers like Repair Clinic can ensure you get the correct part for your specific refrigerator model.
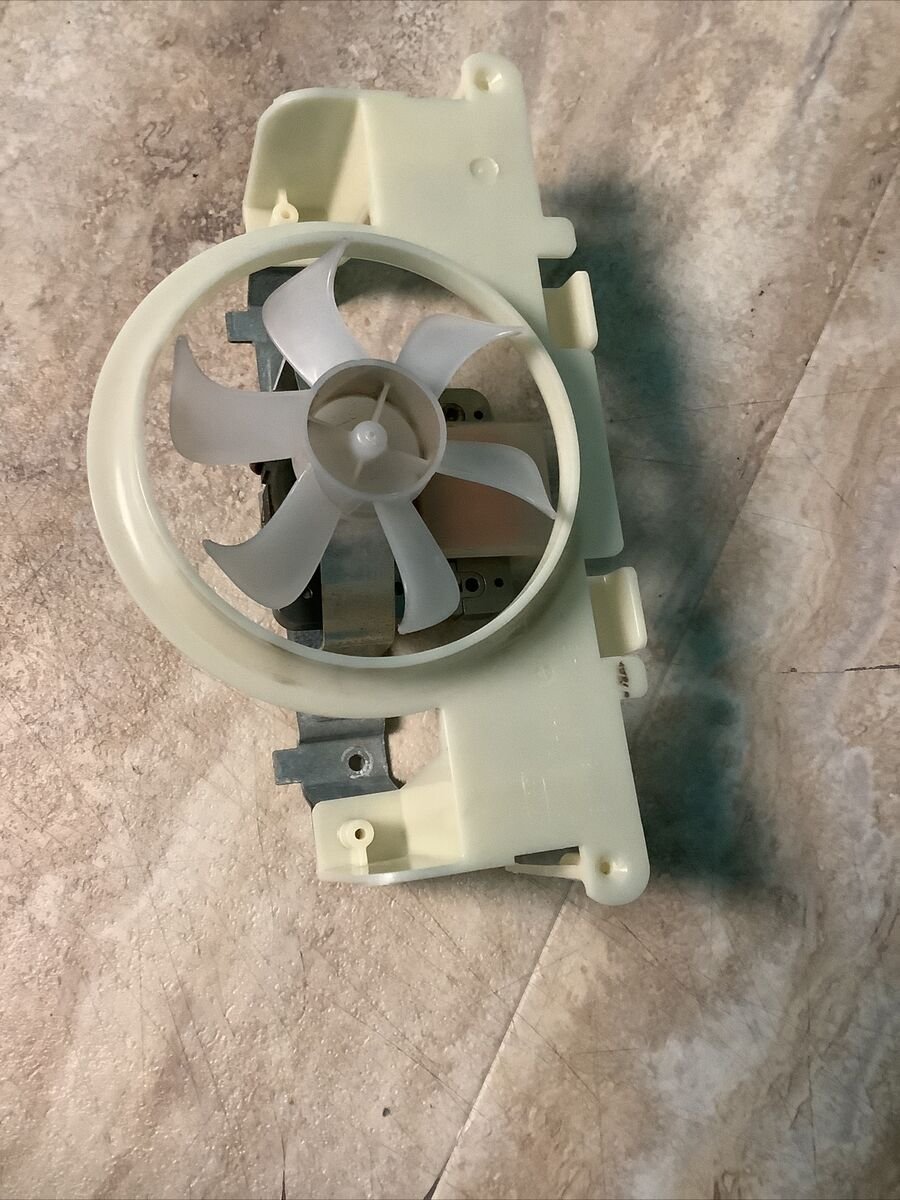
Replacing the freezer fan in a Whirlpool refrigerator is a manageable task if you’re handy with tools and follow safety guidelines. Here’s a step-by-step process to guide you through the replacement:
Safety first! Ensure the refrigerator is unplugged and disconnected from all power sources to prevent any electrical hazards.
Most freezer fans are located behind the back panel of the freezer compartment. Remove any shelving or bins that obstruct your access, then use a screwdriver to remove the panel.
Once you have access to the fan, you may notice that it’s secured with screws and connected with a wiring harness. Disconnect the harness, unscrew the mounting screws, and carefully remove the old fan.
Position the new fan in the same place as the old one. Secure it with the screws you previously removed and reconnect the wiring harness. Make sure everything is snug and secure.
Replace the back panel and any components you had to remove. Ensure that everything fits correctly and that there are no loose parts.
Plug the refrigerator back in and monitor the freezer. It might take a couple of hours to stabilize at the optimal temperature, so give it some time.
To extend the life of your new freezer fan and avoid frequent replacements, consider these maintenance tips:
We hope this guide from TheKitchenApplianceDad.com helps you understand more about your Whirlpool refrigerator’s freezer fan, from recognizing issues to replacing and maintaining the fan. Keep your fridge running smoothly with these tips, and never hesitate to consult a professional if you encounter complex issues.