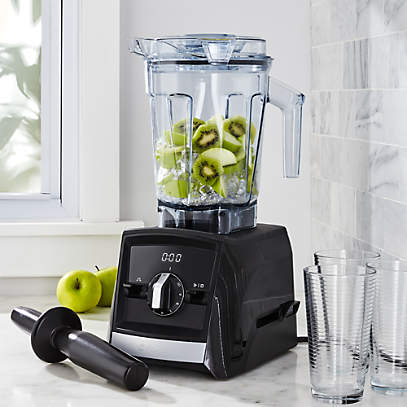
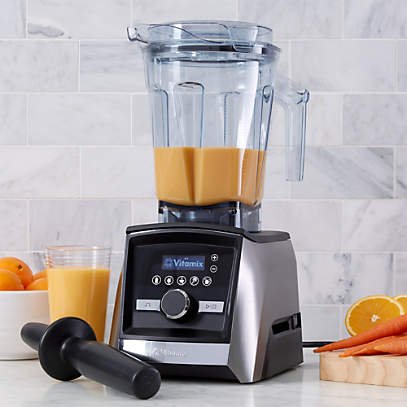
Welcome back to TheKitchenApplianceDad.com, where we dive into the world of culinary gadgets and guide you through the nuances of kitchen mastery. Today, we’re focusing on a beloved powerhouse in the blending world – the Vitamix Ascent series. Whether you’re a smoothie enthusiast, a homemade nut butter aficionado, or someone who simply loves the convenience of a high-powered blender, understanding the ins and outs of your Vitamix can transform your kitchen experience.
Before we delve into the mechanics of operating your Vitamix Ascent blender, let’s appreciate what sets this series apart. The Ascent blenders boast a sleek design, a powerful motor, and a range of features including wireless connectivity, pre-programmed settings, and a self-detect technology that adjusts settings based on the container size. Moreover, they come with a 10-year warranty, ensuring peace of mind with your investment.

First things first, unbox your Vitamix Ascent with care. Inside, you’ll find the motor base, a container, a lid, and a tamper. Some models may also include additional containers or recipe books. Place the motor base on a flat, dry surface and ensure it’s plugged into an outlet.
The Vitamix Ascent series features a variety of controls depending on the model. These typically include:
To attach the container, align it with the motor base and twist it into place. You’ll know it’s secure when it sits evenly and doesn’t wobble. The self-detect technology of the Ascent series ensures that the blender won’t operate unless the container is properly attached.
Locate the power switch on the side or back of the motor base. Flip this switch to the ‘On’ position. You’ll notice the front panel light up, indicating that the blender is ready for action.
If your model has pre-programmed settings, you can select one that matches your desired outcome, such as smoothie, hot soup, or frozen dessert. These settings are designed to provide optimal blending times and speeds for specific recipes.
For manual control, gradually turn the speed dial starting from the lowest setting. As you become more familiar with your Vitamix, you’ll learn which speeds work best for different ingredients and textures.
With the power on and your desired speed set, press the Start button to begin blending. Always start on a low speed and increase gradually to prevent ingredients from splashing and to ensure everything blends evenly.
Should you encounter stubborn ingredients that aren’t blending smoothly, use the tamper provided. Insert it through the lid’s opening and gently push the ingredients towards the blades while the machine is running. Be careful not to touch the blades with the tamper.
For a burst of power, especially handy for chopping or when you want to control the texture more precisely, use the Pulse button. Press and hold it down for short intervals until you reach the desired consistency.
Once you’ve achieved the texture you’re aiming for, it’s time to stop the blender. Press the Start/Stop button to cease operation. If you’ve used a pre-programmed setting, the blender will stop automatically at the end of the cycle.
After you’ve stopped the blending process, it’s a good practice to turn the speed dial back to the starting position and flip the power switch to ‘Off’. This ensures that your Vitamix won’t start unexpectedly the next time you use it.
Remember to wait for the blades to come to a complete stop before removing the container from the base or reaching inside.
A significant advantage of Vitamix blenders is the ease of cleaning. Simply fill the container halfway with warm water, add a drop of dish soap, and run the blender on high for 30 to 60 seconds. Then, rinse the container thoroughly with water, and let it air dry. For more detailed cleaning instructions, especially for the lid and tamper, consult your user manual.
Operating your Vitamix Ascent blender is straightforward once you’re familiar with its features and controls. By following these simple steps, you’ll# How to Turn On, Start and Stop a Vitamix Ascent Blender
When it comes to high-performance blending, the Vitamix Ascent Series is a force to be reckoned with. Known for its robust build, versatile capabilities, and advanced features, a Vitamix blender is an essential tool in the arsenal of any home chef or health enthusiast. At TheKitchenApplianceDad.com, we understand the importance of getting the most out of your kitchen appliances. In this detailed guide, we’ll walk you through the process of turning on, starting, and stopping your Vitamix Ascent blender with ease and confidence.
Unboxing Your Vitamix Ascent Blender
Upon unboxing your Vitamix Ascent blender, you will find several key components: the motor base, blending container, lid, and tamper. Place the motor base on a stable, flat surface and ensure it is near an electrical outlet.
Inspecting Your Blender
Before plugging in the device, inspect it for any visible damage that may have occurred during shipping. If everything looks intact, proceed to the next step.
Flip the Switch
On the side or back of the Vitamix motor base, you will find the main power switch. Flip it to the ‘On’ position. You will notice a light come on or the display activate, signaling that the blender is now live and ready to operate.
Attaching the Container
Align the container with the motor base and securely lock it into position. The Ascent series features a unique Self-Detect technology that ensures the machine won’t run unless the container is properly attached and recognized.
Adding Ingredients
Before turning the blender on, add your ingredients to the container. It’s generally best to add liquids first, followed by softer ingredients, and finally, add any hard or frozen items on top.
Adjusting the Settings
Your Vitamix Ascent blender comes with various settings, including variable speed control and program settings for specific recipes. If you’re using a preset program, select it now. Otherwise, start with the lowest speed setting.
Engaging the Start/Stop Button
Press the Start/Stop button to commence blending. It’s wise to begin at a low speed and gradually increase to higher speeds to prevent splashing and to ensure a more consistent blend.
Using the Tamper
If necessary, use the tamper provided with your Vitamix to help push ingredients down towards the blades for a smoother blend. Do this through the lid’s plug opening, making sure not to touch the blades.
Completion of Blending Cycle
Once you’re satisfied with the consistency of your blend or if you’ve reached the end of a preset program, press the Start/Stop button to stop the blender.
Powering Down
After the blending process is complete and the blades have stopped, turn the speed control back to its starting position and flip the main power switch to ‘Off’ to ensure the blender is completely powered down.
Cleaning your Vitamix is a breeze. Add warm water and a drop of dish soap to the container and run the blender on a high-speed setting for about 60 seconds. Rinse thoroughly and allow it to air dry. Detailed cleaning instructions can be found in the user manual or on the Vitamix website.
By following these straightforward steps, you will not only ensure the longevity of your Vitamix Ascent blender but also enjoy its full range of capabilities to create everything from smoothies and soups to nut butters and frozen desserts. Here at TheKitchenApplianceDad.com, we’re committed to helping you make the most of your kitchen adventures, and

