In the hustle and bustle of kitchen life, every minute counts, especially when you’re timing those perfect meals. One kitchen appliance that helps keep time in check is the KitchenAid microwave. Setting the clock on your KitchenAid microwave is a simple task that ensures your cooking and kitchen schedule run smoothly. Here at TheKitchenApplianceDad.com, we understand the importance of these details, and in this guide, we’ll walk you through the steps to set the clock on various models of KitchenAid microwaves, ensuring you’re never a minute behind!
Understanding Your KitchenAid Microwave Model
Before diving into the steps, it’s crucial to identify your KitchenAid microwave model. KitchenAid offers several microwave models, each with slightly different settings and controls. You can find your model number on the microwave’s door frame, at the back, or in the user manual that came with your appliance.

General Steps to Set the Clock on Most KitchenAid Microwaves
For most KitchenAid microwave models, the process to set the clock is quite standardized. Here’s a general guide that applies to many:
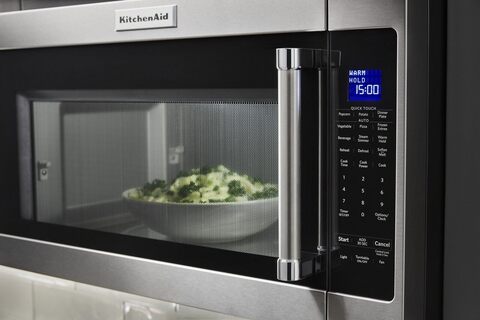
- Locate the ‘Clock’ Button: Typically, this button is found on the control panel. In some models, you might need to press it multiple times or hold it down for a few seconds to activate the clock setting mode.
- Enter the Current Time: Use the number pad to enter the time. Be sure to include the correct hour and minute.
- Select AM or PM: Some models require you to specify AM or PM. This might be done using a separate button or the same number pad.
- Confirm the Time: Usually, you’ll need to press the ‘Start’ or ‘Clock’ button again to set the time. Some models might have a ‘Confirm’ or ‘Enter’ button instead.
Model-Specific Instructions
Setting the Clock on KitchenAid Microwave Model KMHS120ESS
- Step 1: Press ‘Clock Set/Start’ twice.
- Step 2: Enter the time.
- Step 3: Select AM or PM.
- Step 4: Press ‘Clock Set/Start’ again to finish.
For KitchenAid Model KCMC1575BSS
- Step 1: Press and hold ‘Clock’ for 3 seconds.
- Step 2: Enter the time.
- Step 3: Press ‘Start’ to complete the process.
Troubleshooting Common Issues
Sometimes, setting the clock can be interrupted by various issues. Here are a few troubleshooting tips:
- Power Interruptions: If your microwave was recently unplugged or there was a power outage, the clock will need to be reset.
- Non-Responsive Controls: Ensure the microwave is not in use and the door is properly closed. If the control panel is still unresponsive, a reset might be necessary. This can usually be done by unplugging the microwave, waiting a minute, and then plugging it back in.
- Error Codes: If your microwave displays an error code after attempting to set the clock, consult the user manual. Each model has specific codes that can guide you through resolving the issue.
Advanced Features
Some high-end KitchenAid microwave models come with advanced features that affect how you set the clock:
- Wi-Fi Connectivity: Models equipped with Wi-Fi capabilities often allow you to set the clock via a connected app. This is particularly useful for ensuring time accuracy and can be synchronized with other smart kitchen devices.
- Touchscreen Panels: For models with touchscreen panels, the process might involve tapping through a menu rather than pressing physical buttons.
Maintenance and Care
To ensure your KitchenAid microwave continues to function efficiently, regular maintenance and care are essential. Clean the interior and exterior regularly, avoid slamming the door, and only use microwave-safe containers inside. Also, check occasionally for updates on digital models, especially those connected to Wi-Fi, to keep all software up to date.
Key Takeaways
- Identify Your Model: Know your specific KitchenAid microwave model to follow the correct instructions.
- Standard Process: Most models involve pressing the ‘Clock’ button, entering the time, and confirming.
- Troubleshooting: If issues arise, check for power interruptions and ensure the control panel is not locked.
- Advanced Features: Newer models might have features like Wi-Fi connectivity, which can offer alternative ways to set the clock.
- Maintenance is Crucial: Regular cleaning and careful use ensure longer appliance life and proper functionality.
Setting the clock on your KitchenAid microwave is a simple yet essential task. By following the steps outlined above, you can ensure your microwave clock displays the correct time, keeping you on schedule in your culinary adventures. Remember, each model might have its nuances, so when in doubt, refer tothe user manual specific to your model or visit the KitchenAid support website for additional guidance. Keeping your microwave’s clock accurate not only helps in precise cooking but also integrates well with the rhythm of your daily kitchen activities. Happy cooking, and may your meals always be perfectly timed!