
There’s something almost magical about the art of bread-making. From the simplest ingredients—flour, water, yeast, and salt—emerges a variety of delicious bread that can be the centerpiece of a family meal or a comforting snack. However, achieving that perfect texture and rise often comes down to the kneading process. That’s where your trusty KitchenAid mixer comes in. Here at TheKitchenApplianceDad.com, we know that getting your dough just right is essential, so let’s dive into the best speed settings for kneading dough in a KitchenAid mixer.
Before we get to the settings, let’s briefly touch on why kneading is so important. Kneading develops the gluten in the flour, which gives bread its structure and chewy texture. It also helps distribute the yeast evenly throughout the dough, ensuring a consistent rise.
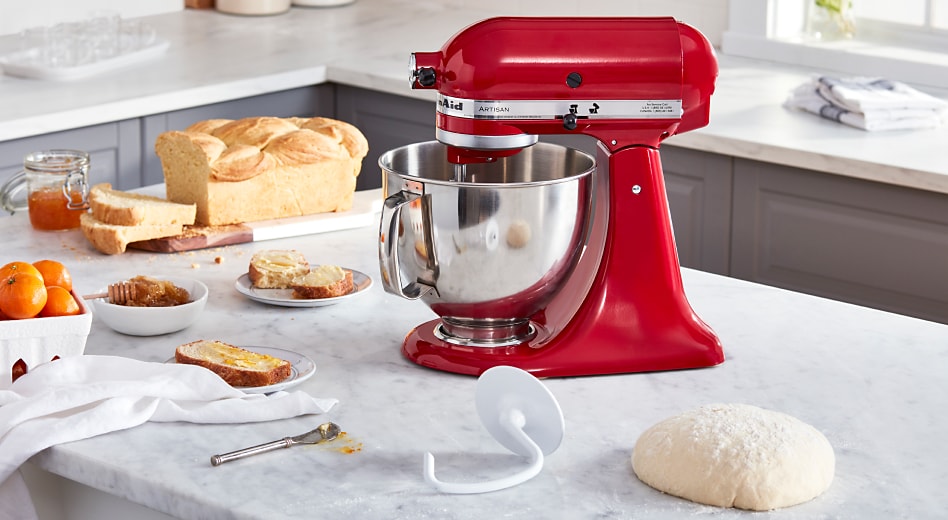
The KitchenAid mixer is a versatile and powerful tool in the kitchen, especially for those who love to bake. Its dough hook attachment is designed to mimic the motion of hand-kneading, making it easier to work with the dough without tiring your arms.
When you first combine your dry and wet ingredients, start your KitchenAid mixer on a low speed setting. This is usually Speed 1 or Stir. This gentle speed allows the ingredients to mix without causing flour to fly out of the bowl or overworking the dough from the start.
Once your ingredients are combined and you have a shaggy dough, it’s time to move on to the actual kneading. At this stage, you’ll want to increase the speed to Speed 2. This is generally recommended for kneading most types of bread dough in a KitchenAid mixer. It’s a moderate speed that works the dough sufficiently without straining the motor or overheating the dough.
It’s important to note that different types of dough may require slight adjustments to the speed. For example:
In addition to speed, the duration of kneading is crucial. Most doughs require about 8 to 10 minutes of kneading in a KitchenAid mixer. However, this can vary depending on the recipe and the type of dough. Always check the dough’s development by using the windowpane test, where a small piece of dough stretched between your fingers should become thin enough to let light pass through without tearing.
KitchenAid mixers are durable, but they’re not indestructible. If you hear the motor straining or the mixer is “walking” on the counter, it’s time to shut it off for a brief rest. Overworking the mixer can cause it to overheat or wear out prematurely.
After you’ve finished kneading, it’s important to clean your KitchenAid mixer properly. Remove the dough hook and wash it by hand or in the dishwasher if it’s dishwasher-safe. Wipe down the mixer itself with a damp cloth, and occasionally check to make sure the hinge where the head tilts back isn’t clogged with flour or dough.
-### Why Kneading Speed Matters
When it comes to kneading dough in a KitchenAid mixer, the speed setting you choose can make a significant difference in the quality of your baked goods. The right speed setting ensures that the dough is worked just enough to develop the gluten without overworking it, which could lead to tough bread.
To start, ensure you’re using the dough hook attachment specifically designed for kneading dough. This hook simulates the kneading process by hand, pushing the dough around the bowl. Now, let’s discuss the optimal speed settings for kneading dough in your KitchenAid mixer.
When you first start mixing your bread dough ingredients, you’ll want to use Speed 1 or the “Stir” setting. This speed slowly incorporates the ingredients without causing flour to dust your kitchen or creating a tough dough from overmixing. It’s the perfect setting for initially wetting your dry ingredients and bringing the dough together.
Once your dough has formed into a cohesive mass, it’s time to step up to Speed 2. This is the standard kneading speed on most KitchenAid mixers and is generally recommended for bread doughs. Speed 2 is powerful enough to work the dough and develop gluten without generating too much heat, which can kill yeast or affect the dough’s texture.
Kneading Time on Speed 2: Generally, dough should be kneaded in the KitchenAid mixer for about 2 minutes on Speed 1, then another 4-6 minutes on Speed 2. However, this can vary based on the recipe and dough type.
There are very few instances where you might need to use Speed 3 for kneading dough. This higher setting could be used for very wet doughs that need a bit more power to come together. However, using Speed 3 should be the exception rather than the rule, as it can quickly overwork the dough and potentially damage your mixer if used for too long.
Generally, anything above Speed 3 is not suitable for kneading dough. Higher speeds are designed for tasks like whipping cream or beating egg whites and can put unnecessary strain on your mixer’s motor when it comes to heavy dough kneading.
Apart from speed, knowing when your dough is properly kneaded is essential. The dough should be smooth, elastic, and slightly tacky to the touch. The “windowpane test” can be a helpful way to determine if the gluten is adequately developed. This involves stretching a small piece of dough between your fingers to see if it becomes translucent without tearing.
Pay attention to your KitchenAid mixer as it kneads. If you hear it straining or notice it rocking, it might be working too hard. This can happen if the dough is too stiff or if the mixer is kneading at too high a speed. If you encounter this, stop the mixer, remove some dough, or adjust the hydration level.
After kneading, always take the time to clean and maintain your mixer. This includes:
At TheKitchenApplianceDad.com, we’ve covered the essential tips and tricks for using your KitchenAid mixer to knead dough. Here are the key takeaways:

