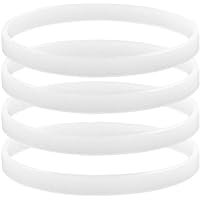
Welcome back to TheKitchenApplianceDad.com, where we aim to provide you with practical advice for maintaining your kitchen appliances. Today, we’re focusing on a common maintenance task for blender enthusiasts: how to replace the gasket on a Nutri Ninja Duo Powerblade.
The Nutri Ninja Duo is a popular blender known for its powerful performance in making smoothies, purees, and a variety of blended concoctions. Over time, the rubber gasket, or seal, located at the base of the blade assembly can wear out or become damaged, potentially causing leaks or a decrease in performance. Replacing the gasket is an essential part of keeping your Nutri Ninja Duo in top condition. Let’s walk through the steps.
Step 1: Gather Your Materials
Before you start, make sure you have the following items:
- A new gasket: Ensure it’s the correct size and model for your Nutri Ninja Duo Powerblade.
- A flat-head screwdriver or a gasket removal tool (if available).
- A clean cloth or towel.
- Warm, soapy water.

Step 2: Disassemble the Powerblade Assembly
- Power Off and Unplug: Always start by powering off your Nutri Ninja and unplugging it from the electrical outlet.
- Remove the Powerblade: Take the Powerblade assembly out of the blender pitcher or cup.
- Detach the Blade: Carefully unscrew the base of the blade assembly if necessary. With some models, the gasket is accessible without fully detaching the blade.
Step 3: Remove the Old Gasket
- Locate the Gasket: Identify the rubber gasket; it’s the ring sitting snugly around the base of the blade assembly.
- Use the Screwdriver: Gently pry the gasket out with a flat-head screwdriver or a gasket removal tool. Be cautious not to damage the blade assembly or the surrounding plastic.
- Dispose of the Old Gasket: Once removed, throw away the old gasket.
Step 4: Clean the Blade Assembly
- Clean Thoroughly: With the gasket removed, it’s a good opportunity to clean the blade assembly. Use warm, soapy water and the cloth to clean any residue or buildup.
- Inspect the Blades: Check for any damage or dullness on the blades that might also require attention.
- Dry Completely: Ensure the blade assembly is completely dry before proceeding with the new gasket installation.
Step 5: Install the New Gasket
- Position the Gasket: Place the new gasket in the groove where the old one was located. Make sure it’s seated flat and evenly all around the blade base.
- No Twists or Folds: Double-check that the gasket is not twisted or folded, as this could cause leaks or other issues.
Step 6: Reassemble the Powerblade
- Reattach the Blade: If you unscrewed the base of the blade assembly, screw it back on carefully, ensuring it’s tight and secure.
- Check Seals: Before using the blender again, make sure the seals are tight and the gasket is properly in place.
Step 7: Perform a Leak Test
- Fill with Water: Put some water in the blender cup and attach it to the blade assembly.
- Check for Leaks: Turn the cup upside down and look for any drips or signs of leaking. If there are leaks, double-check the gasket’s placement and the tightness of the assembly.
Step 8: Test with a Blend
- Use the Blender: Make a simple blend to ensure everything is working correctly. Listen for any unusual sounds and ensure that there are no leaks during operation.
Tips for Ongoing Maintenance
- Regular Inspections: Periodically check the condition of the gasket and blades for wear.
- Don’t Over-tighten: When reassembling, tighten just enough to seal. Over-tightening can deform the gasket or damage threads.
- Order Spare Parts: Keep an extra gasket on hand to minimize downtime in case of unexpected wear.
Conclusion
Replacing the gasket on your Nutri Ninja Duo Powerblade is a straightforward task that can extend the life and performance of your blender. Regular maintenance and timely replacement of worn parts keep your appliance running smoothly and your blends coming out perfectly.
Key Takeaways
- Always work with the blender unplugged and powered off.
- Handle the Powerblade and gasket carefully to avoid damage.
- Clean the blade assembly thoroughly before installing a new gasket.
- Ensure the new gasket is seated correctly without twists or folds.
- Perform a leak test to verify the integrity of the new gasket.
For more tips and guides on maintaining your kitchen appliances, keep visiting TheKitchenApplianceDad.com. Here’s to manymore delicious and leak-free blends in your future! Cheers to a well-maintained kitchen where your creativity and culinary skills can thrive.


