When it comes to maintaining and repairing your GE freezer, one task you might encounter is removing the fan cover. This can be necessary for various reasons, such as cleaning out dust and debris, checking on the fan’s condition, or troubleshooting issues like unusual noises or improper cooling. Whatever your reason, knowing how to safely remove the fan cover can save you time and potentially expensive service fees.
In this detailed guide from TheKitchenApplianceDad.com, I’ll walk you through the steps to successfully and safely remove the fan cover from your GE freezer. Let’s dive into the specifics to ensure you can handle this task like a pro!
Before beginning any work on your freezer, safety must be your top priority. Here are a few crucial steps to ensure a safe process:

In most GE freezer models, the fan cover is located at the back of the freezer compartment. You might need to remove items stored in the freezer, as well as any shelving or drawers, to access the cover easily.
Once you’ve located the fan cover, you’ll find that it is usually secured with screws. Using the appropriate screwdriver, carefully remove these screws. Keep them in a safe place; you’ll need them to reattach the cover later.
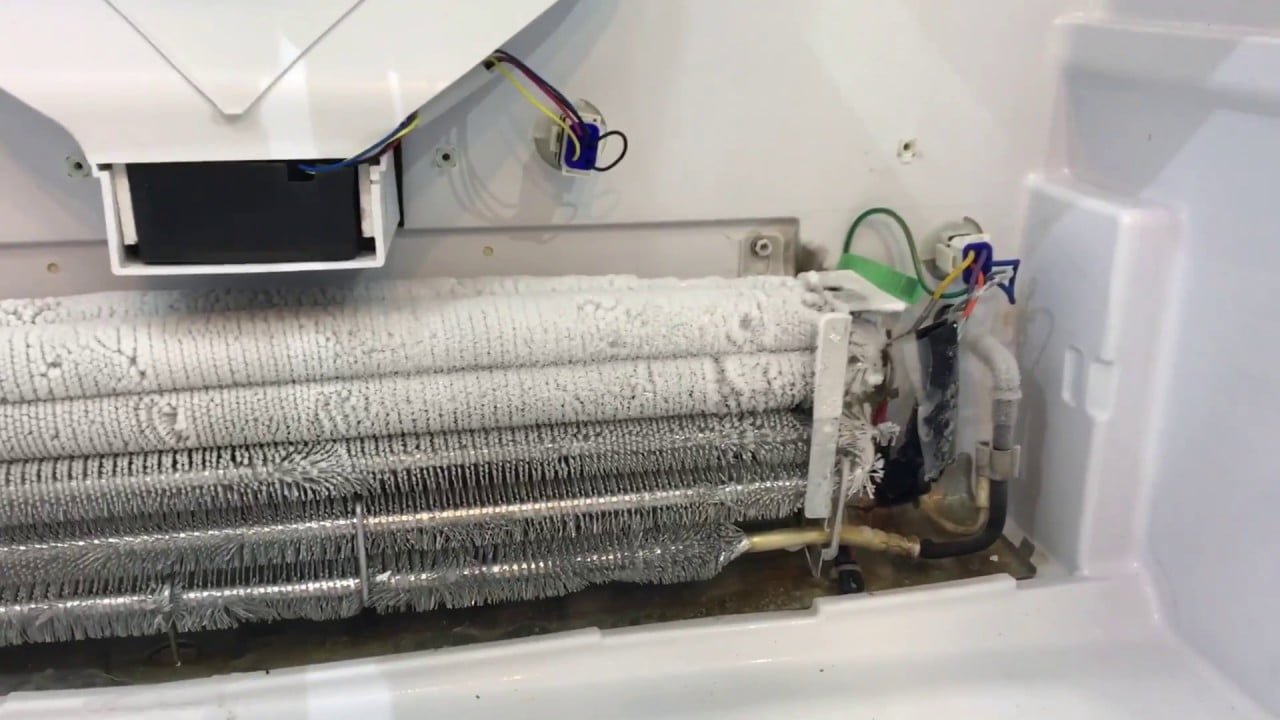
After removing the screws, gently pull the cover towards you. It should come off easily. If it doesn’t, check to see if any additional screws or clips are holding it in place. Be mindful of any wires or sensors attached to the cover. If you encounter resistance, it’s better to double-check than to force the cover off and risk damaging something.
With the fan cover removed, you can now perform any maintenance needed. This might include cleaning the fan blades to improve efficiency, checking for any obstructions, or assessing the condition of the cooling elements.
Once your maintenance is complete, replace the fan cover by aligning it back into position and securing it with the screws you removed earlier. Make sure the cover is firmly in place to prevent any cooling inefficiencies or noise issues.
After you have replaced the fan cover and reassembled any other parts of the freezer you had to remove, plug the appliance back into the power source. It’s a good idea to monitor the freezer for a few hours to ensure it returns to its normal operation without any issues.
By following this guide, you should feel confident in removing the fan cover from your GE freezer, whether for cleaning, inspection, or troubleshooting. Remember, taking the time to understand and care for your appliances can lead to better performance and longer life. Happy maintaining from all of us at TheKitchenApplianceDad.com!