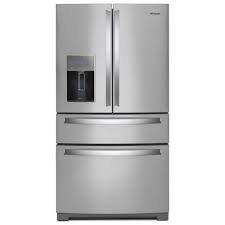
Welcome to another comprehensive guide from TheKitchenApplianceDad.com. Today, we’re tackling a task that might seem daunting at first but is quite manageable with the right instructions: removing the freezer drawer from a Whirlpool French Door Refrigerator. Whether you need to perform a thorough cleaning, troubleshoot a problem, or replace a part, removing the freezer drawer is a necessary step. Let’s dive into the step-by-step process to ensure you can do this safely and efficiently.
Understanding Your Whirlpool French Door Refrigerator
Before we get started, it’s important to know that Whirlpool manufactures a variety of French door refrigerators, and while the basic removal steps are similar, there might be slight variations depending on the specific model you own. Typically, the model number of your refrigerator can be found on a label inside the fridge, usually on the upper right side. You can use this model number to access specific guides and manuals directly from Whirlpool’s official site.
Tools You Might Need
- A pair of gloves: To protect your hands from cold temperatures and sharp edges.
- A flat-head screwdriver: For prying off any covers or releasing tabs.
- A Phillips head screwdriver: In case there are screws that need to be removed.

Step-by-Step Guide to Removing the Freezer Drawer
Step 1: Unplug Your Refrigerator
Safety first! Ensure that your refrigerator is unplugged from the power outlet to avoid any electrical hazards. This step is crucial before attempting any repairs or maintenance.
Step 2: Empty the Freezer Contents
Remove all items from your freezer to prevent any obstructions during the removal process. This is also a good time to discard expired or unwanted freezer items.
Step 3: Remove the Ice Maker (if applicable)
If your model is equipped with an ice maker, you will need to remove it before you can take out the freezer drawer. Here’s how:
- Locate the Ice Maker: It is typically situated on the top left side of the freezer.
- Disconnect the Wiring: There should be a wiring harness that connects the ice maker to the freezer. Release any securing tabs or screws, and gently disconnect the harness.
- Remove the Ice Maker: Check for any screws securing the ice maker to the freezer walls and remove them. Carefully lift the ice maker out of the compartment.
Step 4: Remove the Freezer Drawer
- Extend the Drawer: Pull the freezer drawer out to its full extension.
- Locate the Screws: Look for screws on the side rails that hold the drawer in place. These are typically located on the upper track assembly.
- Remove the Screws: Use your Phillips head screwdriver to remove these screws.
- Lift the Drawer: With the screws removed, lift the drawer up and out towards you. Be careful as the drawer might be heavy.
Step 5: Remove the Drawer Front (if necessary)
Sometimes, you might need to remove the drawer front separately:
- Locate the Tabs or Screws: Check the sides of the drawer for tabs or screws that secure the front panel.
- Release the Tabs or Remove the Screws: Use a flat-head screwdriver to pry off the tabs or a Phillips head screwdriver to unscrew.
- Detach the Front Panel: Once the securing tabs or screws are removed, the front panel should come off easily.
Reassembling the Freezer Drawer
To put everything back together, simply reverse the steps:
- Attach the Drawer Front: If you removed the front panel, snap it back into place or reattach it using the screws.
- Insert the Drawer: Slide the drawer back into the rail tracks and ensure it is aligned properly.
- Secure with Screws: Replace and tighten the screws on the side rails.
- Reinstall the Ice Maker: If you removed an ice maker, now is the time to put it back. Reattach the wiring harness and secure the ice maker with screws.
- Reload the Freezer: Place your items back into the freezer.
- Plug in the Refrigerator: Once everything is assembled, plug the refrigerator back into the power outlet.
Key Takeaways
- Safety First: Always unplug your refrigerator before attempting any maintenance.
- Tools Needed: Have your gloves and screwdrivers ready.
- Remove Items: Clear out your freezer and remove the ice maker if applicable.
- Careful Removal and Assembly: Follow the steps carefully for both removal and reassembly to avoid any damage.
Removing the freezer drawer from a Whirlpool French Door Refrigerator is a straightforward process once you know the proper steps. With this guide from TheKitchenApplianceDad.com, you’re well-equipped to handle this task likea pro. Whether it’s for cleaning, troubleshooting, or replacing parts, knowing how to properly remove and reinstall your freezer drawer is an invaluable skill for any DIY enthusiast. Remember, always refer to your specific model’s manual for any particular instructions related to your refrigerator. Stay cool and happy fixing!

