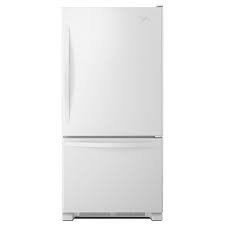
When it comes to organizing and optimizing space in your freezer, the divider in your Whirlpool model plays a crucial role. However, there may be times when you need to remove this divider, whether for cleaning, defrosting, or reorganizing the space for bulkier items. At TheKitchenApplianceDad.com, we understand that dealing with appliances can sometimes seem daunting. That’s why we’re here to guide you through the process of removing and reinstalling the divider in your Whirlpool freezer with ease.
Before you begin, it’s important to identify your specific Whirlpool freezer model. This information can usually be found on the inside of the appliance, near the door, or in the user manual that came with your freezer. Knowing your model will help you understand whether the divider is meant to be removable and will provide specific instructions tailored to your appliance.
Safety first! Ensure that your freezer is unplugged and that you have removed any food items near the divider. This not only prevents any accidents but also makes it easier to access the divider without obstructions.
Open your freezer and locate the divider. In most Whirlpool models, the divider is situated horizontally or vertically, dividing the space into more manageable sections.
Examine the divider to check if there are any fasteners, clips, or screws holding it in place. Some dividers are designed to slide out without needing tools, while others might require a gentle unscrewing or unclipping.
If your divider is clipped in, gently unclip it from both ends and carefully lift it out of the freezer. If it’s screwed in, use an appropriate screwdriver to loosen the screws and then remove the divider. For slide-out models, gently pull the divider towards you, making sure not to force it if it feels stuck.
Once removed, this is a great opportunity to clean the divider using a soft cloth or sponge with some mild detergent. Also, inspect the divider for any signs of wear or damage. If it looks compromised, consider replacing it to maintain the efficiency and safety of your freezer.
Reinstalling the divider is generally the reverse process of removing it. However, ensuring that it fits perfectly back into place is key to maintaining the functionality of your freezer.
Make sure the divider is dry and clean. Check the edges for any damage which might hinder the reinstallation.
Carefully align the divider back into its original position in the freezer. Ensure it is straight and aligned with any grooves or clips.
If your divider uses clips or screws, securely fasten it back into place. For a slide-in model, gently slide the divider into its slot, making sure it’s snug and secure.
Once installed, gently tug on the divider to ensure it’s securely in place. This step is crucial to prevent it from dislodging when the freezer is being used.
Plug your freezer back in and wait for it to reach its optimal temperature before restocking your food items. This is also a good time to organize and sort through what goes back in, optimizing space and accessibility.
By following these steps, you can efficiently remove and replace the divider in your Whirlpool freezer, ensuring it continues to serve its purpose effectively. Remember, a well-maintained appliance is key to its longevity and performance. For more tips and guides on handling kitchen appliances, stay tuned to TheKitchenApplianceDad.com. Happy organizing!


