quickly-replace-your-frigidaire-microwave-light-bulb

How To Quickly Replace Your Frigidaire Microwave Light Bulb

Microwaves are an essential part of modern kitchens, saving time and making food preparation easier. Among the various brands available, Frigidaire is known for manufacturing reliable and efficient kitchen appliances. However, like any household appliance, they may occasionally require maintenance. One common issue you might encounter is a burnt-out light bulb. At TheKitchenApplianceDad.com, we understand the importance of a well-lit microwave interior, so let’s dive into how you can quickly replace your Frigidaire microwave light bulb.

Safety First

Before we get started on the process, it’s crucial to prioritize your safety. Always unplug your microwave from the power source before attempting any repairs or maintenance. This eliminates the risk of electric shock and ensures your safety throughout the replacement process.
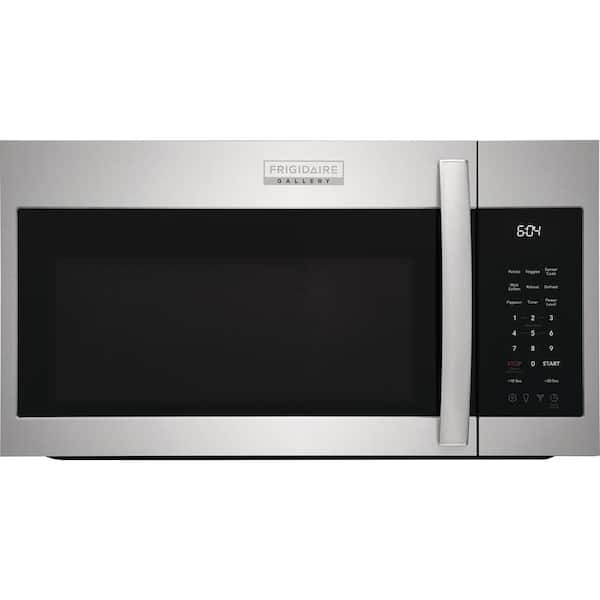
Frigidaire Gallery 1.9 cu. ft. Over the Range Microwave in Smudge-Proof Stainless Steel with Sensor Cooking Technology GMOS1962AF - The Home Depot

Identify the Bulb Type

Consult the User Manual

The first step in replacing the light bulb is determining the correct type of bulb for your specific Frigidaire microwave model. The user manual is an excellent resource for this information. It typically lists the bulb size, wattage, and sometimes the specific part number required. If you’ve misplaced your manual, don’t worry. You can usually find a digital copy on the Frigidaire support website by entering your microwave’s model number.

Purchase the Replacement Bulb

Once you’ve identified the bulb type, you can purchase a replacement from a home improvement store, an electronics store, or directly from Frigidaire. Ensure that the replacement matches the specifications listed in the manual to avoid potential damage to your appliance.

Locate the Light Bulb

The light bulb in a Frigidaire microwave can be situated in different locations, depending on the model. It may be behind a grille or panel on the interior or accessible from the exterior. Here’s how to locate it:

Interior Access

  • Remove the Grille or Cover: If the bulb is accessed from the interior, you will typically need to remove a grille or cover. This is often secured with screws or can be snapped off with a bit of gentle pressure.
  • Locate the Bulb: Once the cover is off, you should see the light bulb.

Exterior Access

  • Access from the Bottom: In some models, the light bulb is accessed from underneath the microwave. Look for a small panel or door that can be opened or unscrewed to reveal the bulb.
  • Access from the Side or Back: In rare cases, you may need to move the microwave to access a panel on the side or the back of the unit.

Replace the Bulb

Now that you’ve located the bulb, follow these steps to replace it:

Interior Light Bulb Replacement

  1. Gently Unscrew the Old Bulb: Turn the bulb counterclockwise to unscrew it from the socket. Be careful, as the bulb may be fragile.
  2. Install the New Bulb: Screw in the new bulb clockwise until it is secure. Avoid over-tightening, which could damage the bulb or socket.
  3. Replace the Grille or Cover: Once the new bulb is in place, reattach the grille or cover.

Exterior Light Bulb Replacement

  1. Open the Access Panel: Unscrew or open the access panel to reveal the light bulb.
  2. Remove the Old Bulb: Same as above, turn the bulb counterclockwise to unscrew it from the socket.
  3. Insert the New Bulb: Screw the new bulb into the socket, turning it clockwise.
  4. Close the Access Panel: Secure the panel back into place.

Test the New Bulb

With the new bulb installed, it’s time to test it:

  • Plug in the Microwave: Reconnect your microwave to the power source.
  • Test the Light: Open the microwave door or use the light switch (if available) to ensure that the new bulb illuminates.

If the light does not turn on, double-check that the bulb is correctly installed and that it’s the right type for your model. It’s also a good time to ensure there are no other underlying electrical issues with your microwave.

Proper Disposal of the Old Bulb

Dispose of the old bulb responsibly. Because it contains small amounts of metal and glass, it should not be thrown in with regular household trash if possible. Look for local recycling centers or special waste collection programs that accept light bulbs.

Maintenance Tips

To prolong the life of your microwave and its components, here are a few quick maintenance tips:

  • Clean Regularly: Wipe down the interior and exterior with a damp cloth to prevent the build-up of grease and food particles.
  • Use Correct Settings: Avoid using settings that are too high for the typeof food being cooked, as this can put unnecessary strain on the microwave’s components.
  • Avoid Slamming the Door: This can lead to damage over time, not just to the bulb but to the door latch system as well.
  • Check for Recalls: Occasionally, manufacturers like Frigidaire will issue recalls or safety notices. Stay informed by registering your appliance or checking the U.S. Consumer Product Safety Commission for updates.

Conclusion

Replacing the light bulb in your Frigidaire microwave is a simple task that can be done quickly and safely with the right preparation. Remember to consult your user manual for the correct bulb specifications and to follow the safety steps outlined. With your new bulb installed, your microwave will be back to its fully functional state, providing you with the visibility you need for all your cooking adventures.

At TheKitchenApplianceDad.com, we’re dedicated to helping you keep your appliances running smoothly. Whether you’re a seasoned DIY enthusiast or new to appliance maintenance, we hope this guide has made the process of replacing your Frigidaire microwave light bulb straightforward and hassle-free.

Key Takeaways

  • Safety First: Always unplug your microwave before attempting to replace the light bulb.
  • Identify the Correct Bulb: Use your user manual to determine the right bulb type and wattage for your model.
  • Locate the Bulb: The bulb may be located behind a grille or panel inside, or accessed from the bottom, side, or back of the microwave.
  • Replace the Bulb: Unscrew the old bulb and screw in the new one, being careful not to over-tighten.
  • Test the New Bulb: After replacement, plug in the microwave and test the new bulb.
  • Dispose Responsibly: Recycle the old bulb if possible, rather than throwing it away with regular trash.
  • Maintain Regularly: Clean your microwave and use it properly to extend the life of all its components.

By following these steps, you’ll be able to efficiently replace your Frigidaire microwave light bulb and carry on with your culinary tasks with a well-lit microwave interior. If you found this guide helpful, be sure to check out more tips and tricks for all your kitchen appliances at TheKitchenApplianceDad.com. Happy cooking!

Meet

Dale

Hi, I'm Dale! With over ten years in high volume restaurants, my journey has taken me through the ins and outs of using, maintaining, and even repairing virtually every kitchen appliance imaginable.

I'm here to share simple, straightforward advice to help you choose and use your kitchen tools effectively. No fluff, just the essential info you need to cook up a storm.