Moving can be a stressful event, and when it comes to packing up your kitchen, extra care is required for your appliances. Among these, the KitchenAid mixer stands out as a valuable and often sentimental piece of equipment for those who love to bake and cook. At TheKitchenApplianceDad.com, we understand the importance of keeping your appliances safe during a move. Here’s your comprehensive guide to properly packing your KitchenAid mixer to ensure it arrives at your new home in perfect working condition.
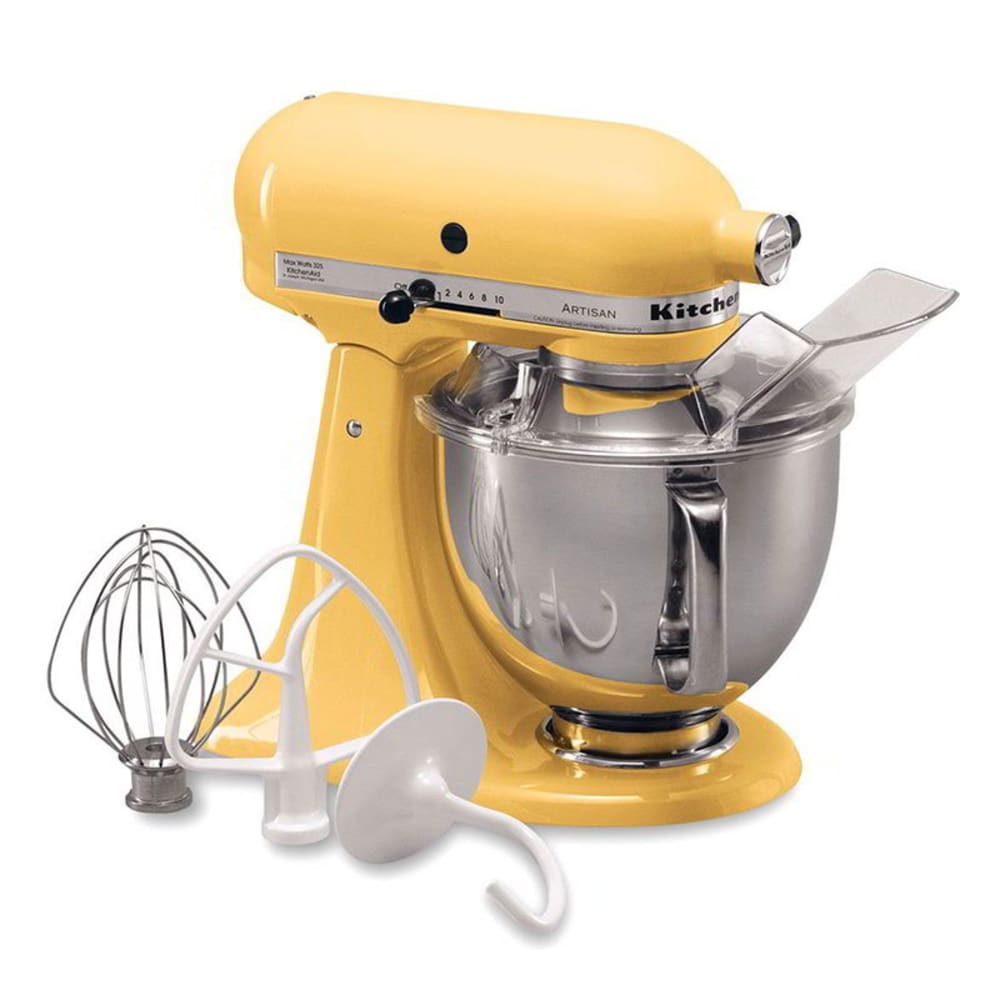
Before we dive into the packing process, it’s important to understand that your KitchenAid mixer is a sturdy yet sophisticated piece of machinery. It consists of various components like the main mixer body, the mixing bowl, attachments such as the paddle, whisk, and dough hook, and possibly additional accessories. Its weight and multiple parts need to be considered to prevent damage.

To get started, gather the following materials:
Before packing, ensure that your KitchenAid mixer is clean and dry. Any moisture can lead to mold or mildew, and crumbs or food residue can attract pests or cause unpleasant odors.
Carefully remove the bowl, attachments, and any other removable parts from the mixer. Wrap each piece separately in bubble wrap or packing paper, securing them with tape so that the material doesn’t slip off during the move.
If you have a tilt-head model, make sure the head is locked into place. You don’t want it moving around during transport. If you have a bowl-lift model, lower the arms and secure them.
Wrap the main body of your mixer in bubble wrap, paying extra attention to protruding parts like the motor head and speed controls. Secure the wrap with tape.
If you have the original box, it’s the best option for packing your mixer, as it was designed specifically for this purpose. If not, choose a sturdy box that’s a bit larger than your mixer to allow for cushioning material around the sides, top, and bottom.
Place a layer of packing paper or bubble wrap at the bottom of the box to create a soft cushion.
Carefully lower the main body of the mixer into the box. It should sit in the center with enough space around it for additional padding.
Place the wrapped bowl, attachments, and other parts around the main body. Ideally, each piece should be snug but not pressing hard against each other or the mixer.
Use crumpled packing paper, bubble wrap, or even kitchen towels to fill any empty spaces in the box. This prevents the mixer and parts from shifting and hitting each other during transit.
Once everything is inside, add a final layer of protective material on top before closing the lid of the box. Tape the box securely, reinforcing the bottom and the top with several layers of tape.
Using a permanent marker, clearly label the box as “Fragile – KitchenAid Mixer” and indicate which side should be up. It’s also helpful to note the room it belongs to, such as “Kitchen.”
If possible, take photos or videos of your packing process. This can be helpful for setting up at your new place or in the unfortunate event of an insurance claim.
Moving your KitchenAid mixer doesn’t have to be a recipe for disaster. By following these detailed packing steps, you can ensure your beloved appliance stays safe and sound as you transition to your new kitchen space. Just remember, when it comes to moving appliances, a little extra care goes a long way. Happy mixing in your new home!
For more tips on handling kitchen appliances with care, keep following TheKitchenApplianceDad.com. We are here to help make your culinary transitions as smooth as your favorite cake batter!

