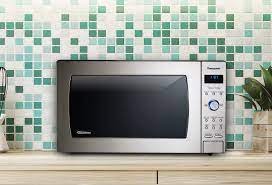
Welcome to another practical guide from TheKitchenApplianceDad.com. Today, we’re diving into a common but sometimes frustrating kitchen task: setting the clock on your Panasonic microwave. Whether you’ve just purchased your microwave or you’ve been resetting clocks due to daylight saving time or a power outage, getting your microwave’s clock right is essential not only for cooking but also for the overall harmony of your kitchen’s appliance suite.
Before we jump into the steps, let’s briefly discuss why it’s important to have the correct time on your microwave. Firstly, many microwave cooking instructions are based on precise timing. If your clock is off, you might find your meals either undercooked or overcooked. Secondly, the clock on your microwave often serves as the only clock in many kitchens, helping you keep track of time as you cook.

Setting the clock on a Panasonic microwave is generally a straightforward process, though the steps can vary slightly depending on the model. Below is a general guide that should help you through most models, with some additional tips for specific types of Panasonic microwaves.
First, find the ‘Clock’ button on your microwave. In most Panasonic models, this is clearly labeled and located on the control panel. If you can’t find it, refer to your microwave’s user manual. Panasonic’s support website can be a handy resource if you’ve misplaced your physical manual. You can find manuals for most models here.
Once you press the ‘Clock’ button, the display panel will generally blink or show a prompt indicating that you can enter the time. Use the number pad to enter the current time. For most models, you need to enter the time in a four-digit format. For example, for 9:30, you would press 0, 9, 3, 0.
After entering the time, you need to lock it in. This is usually done by pressing the ‘Clock’ button again or by pressing the ‘Start’ or ‘Enter’ button, depending on your model. Some newer models might have a ‘Save’ or ‘Set’ button.
If your Panasonic microwave uses a 12-hour clock (as most do), make sure you set the time with the correct AM or PM designation. Often, there is an AM/PM button you press to toggle between the two. For models that use a 24-hour clock, ensure you enter the right time accordingly.
Panasonic NN-SN686S:
Panasonic NN-ST651W:
Panasonic NN-SD975S:
By following these steps, setting the clock on your Panasonic microwave should be a breeze. Keep this guide bookmarked for those inevitable moments when you need a quick ref### How to Set the Clock on Your Panasonic Microwave in a Snap
Microwaves are a staple in modern kitchens, but the influx of features and buttons can sometimes make simple tasks—like setting the clock—seem more complicated than they actually are. If you’ve recently purchased a Panasonic microwave or experienced a power outage, you might be staring at a blinking “00:00” on your microwave’s display. Don’t worry; you’re just a few steps away from getting it set up correctly. Here’s a quick and easy guide from TheKitchenApplianceDad.com on how to set the clock on your Panasonic microwave.
Before diving into the specifics, let’s briefly touch on why it’s crucial to have the correct time on your microwave:
The process to set the clock on a Panasonic microwave is straightforward, although it can vary slightly between different models. Here’s a general guide that applies to most Panasonic microwaves:
Firstly, identify the ‘Clock’ button on your microwave’s control panel. On most Panasonic models, this button is clearly marked. If your model has a different label, refer to your user manual for guidance.
Press the ‘Clock’ button, and the display should blink or prompt you to enter the time. Use the numeric keypad to type in the time. For instance, for 3:45, you would press “3,” “4,” “5.” If your microwave’s keypad includes separate buttons for hours and minutes, enter each accordingly.
After entering the correct time, solidify your input by pressing ‘Clock’ again, or depending on your model, you might need to press ‘Start’ or ‘Enter.’ This step varies by model, so if the time doesn’t set, try using these alternative buttons.
If your microwave operates on a 12-hour cycle, make sure to set the correct AM or PM. This is usually adjusted by continuing to press the ‘Clock’ button until the correct period of the day is displayed next to the time.
Setting the clock on your Panasonic microwave is a simple task that should take just a minute of your time. By following these steps, you can ensure that your microwave displays the correct time, helping you manage your kitchen activities more efficiently. Remember, when in doubt, the user manual is your best friend. Happy cooking, and make sure to check back with TheKitchenApplianceDad.com for more handy kitchen appliance tips and tricks!

