how-to-replace-the-door-gasket-on-your-kenmore-freezer

How To Replace The Door Gasket On Your Kenmore Freezer And Why It’s Important

Maintaining your Kenmore freezer in top-notch condition is crucial for ensuring food preservation and energy efficiency. One of the most common issues that can affect your freezer’s performance is a worn or damaged door gasket. At TheKitchenApplianceDad.com, we understand the importance of keeping your appliances running smoothly. In this guide, we’ll walk you through the steps to replace the door gasket on your Kenmore freezer and explain why it’s an essential maintenance task.

Understanding the Role of the Door Gasket

The door gasket, or seal, is the rubber lining that forms a tight closure around the door of your freezer. Its primary function is to keep the cold air inside the freezer and prevent warm air from entering. This not only ensures that your food stays frozen and safe from spoilage but also helps in maintaining the efficiency of your freezer, reducing energy consumption and saving you money on utility bills.

Signs That You Need a New Door Gasket

Before we dive into the replacement process, let’s identify some signs that indicate a need for a new door gasket:

  • Visible Wear and Tear: If the gasket is cracked, torn, or has chunks missing, it’s time for a replacement.
  • Loose Gasket: A gasket that doesn’t stick properly or has become loose can’t form an effective seal.
  • Condensation or Ice Build-Up: These can be signs that warm air is entering the freezer, which could be due to a faulty gasket.
  • Increased Energy Bills: If your freezer is working harder to maintain the temperature, it might be due to warm air leaks through a compromised door seal.

Refrigerator Seal Freezer Magnetic Sealing Strip Door, 46% OFF


Tools and Materials Needed

  • Replacement Gasket: Make sure to purchase the correct model specific to your Kenmore freezer. You can find this on the Sears PartsDirect website.
  • Screwdriver: Needed for removing any screws holding the gasket in place.
  • Mild Soap and Warm Water: For cleaning the door and the new gasket.
  • Towel: To dry off the surfaces after cleaning.

Step-by-Step Guide to Replacing Your Kenmore Freezer’s Door Gasket

Step 1: Unplug the Freezer

For safety, always start by unplugging the freezer.

Step 2: Remove the Old Gasket

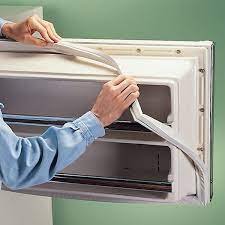
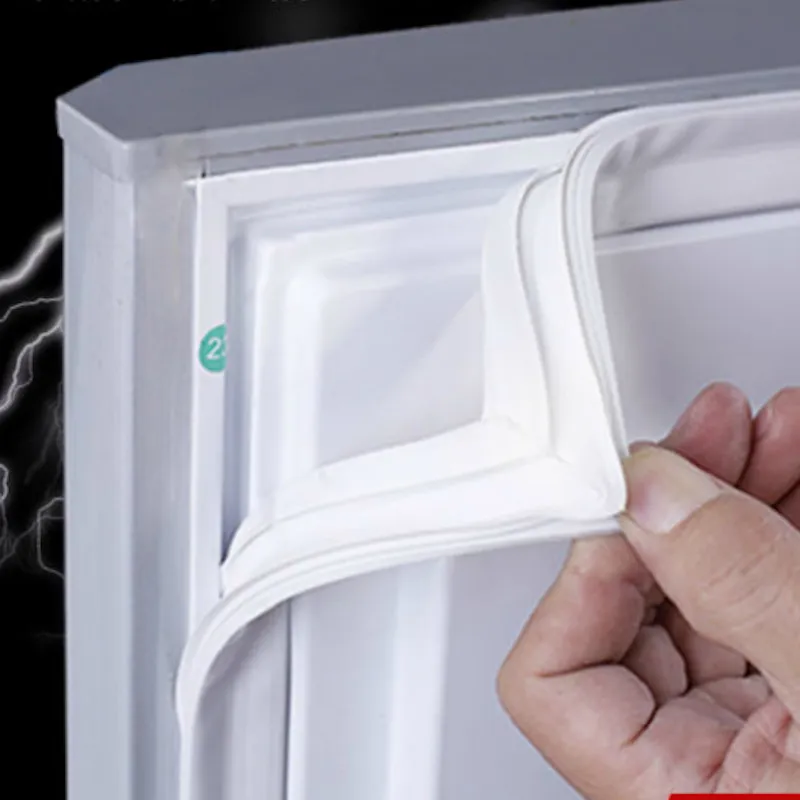
Open the freezer door and inspect how the gasket is attached. Some gaskets are snapped into place while others might be screwed. Use the screwdriver to loosen any screws and gently pull the old gasket off the door.

Step 3: Clean the Gasket Track

Once the old gasket is removed, clean the gasket track and the door edges where the new gasket will seal. Use mild soap and warm water to remove any grime or residue, and then dry thoroughly with a towel.

Step 4: Prepare the New Gasket

Before installation, soak the new gasket in warm water or use a hairdryer to warm it, which will make it more pliable and easier to install.

Step 5: Install the New Gasket

Start at the top corner of the door and press the lip of the new gasket into the track. Work your way around the door, pressing firmly to ensure it is seated correctly. If your model uses screws, replace them to secure the gasket.

Step 6: Check for Leaks

Close the freezer door and check for gaps or leaks in the seal. Adjust as necessary by loosening the gasket and repositioning it.

Step 7: Plug the Freezer Back In

Once you are satisfied with the installation, plug the freezer back in. It’s a good idea to monitor the freezer for the next few hours to ensure that it returns to its normal operating temperature.

Why Replacing Your Freezer’s Door Gasket Is Important

  • Energy Efficiency: A proper seal ensures that the freezer does not overwork, which conserves energy and extends the life of its components.
  • Cost Savings: Efficient energy use translates to lower electricity bills.
  • Food Safety: Maintains the correct temperature to prevent food spoilage.
  • Prevents Frost Build-up: Minimizes the risk of excessive frost, which can affect the freezer’s performance.

Key Takeaways

  • Regular Inspection: Check your freezer’s door gasket periodically for signs of wear and tear.
  • Right Materials: Always use the correct replacement gasket specific to your Kenmore model.
  • Proper Installation: Ensure the gasket is installed without any gaps or leaks to maintain efficiency.
  • Maintenance: Clean the gasket and the area it seals against regularly to prolong its life and effectiveness.

By following these steps and understanding the importance of a well-functioning door gasket, you can ensure that your Kenmore freezer operates efficientlyfor years to come. Remember, a little maintenance goes a long way in ensuring the longevity and efficiency of your kitchen appliances. For more tips and guides on appliance maintenance, keep reading TheKitchenApplianceDad.com.

Meet

Dale

Hi, I'm Dale! With over ten years in high volume restaurants, my journey has taken me through the ins and outs of using, maintaining, and even repairing virtually every kitchen appliance imaginable.

I'm here to share simple, straightforward advice to help you choose and use your kitchen tools effectively. No fluff, just the essential info you need to cook up a storm.