If you’ve noticed your Whirlpool top freezer isn’t performing as efficiently as it used to, or you see excessive frost buildup, it might be time to check the defrost heater. A malfunctioning defrost heater can lead to a range of issues, from poor cooling performance to increased energy consumption. In this post on TheKitchenApplianceDad.com, we’ll guide you through the steps to replace the defrost heater in your Whirlpool top freezer and explain why this maintenance is crucial for the longevity and efficiency of your appliance.
What is a Defrost Heater?
The defrost heater is an essential component in many modern frost-free refrigerators and freezers. It’s designed to prevent excessive frost buildup by periodically heating the evaporator coils, thus melting any accumulated frost or ice. This process ensures that air continues to flow freely through the coils, allowing the refrigerator to maintain optimal cooling temperatures.
Why Replacing the Defrost Heater MattersTesting the Old Defrost Heater
Before purchasing a new defrost heater, it’s advisable to ensure that the existing one is indeed faulty. To test the defrost heater, you will need a multimeter:
- Disconnect the power: Unplug the refrigerator to ensure safety.
- Access the defrost heater: Depending on your model, this might be located behind the back panel of the freezer compartment.
- Disconnect the heater: Remove any connectors or screws holding the heater. Note the configuration for easy reassembly.
- Set your multimeter to the ohms setting and test the heater by placing each probe on the heater terminals.
- Check the reading: A functioning defrost heater should show a continuity in ohms (typically between 10 to 50 ohms). A much higher reading or no continuity indicates a faulty heater.

Step-by-Step Guide to Replacing the Defrost Heater
Preparation
- Tools Required: Phillips head screwdriver, flathead screwdriver, multimeter (for testing), and a new defrost heater.
- Safety Precautions: Always unplug the appliance before starting any repair work to avoid electrical hazards.
Installation Steps
- Unplug the Refrigerator: Safety first! Ensure the appliance is disconnected from the power source.
- Remove the Freezer Contents and Shelves: Clear out the freezer and remove any shelves to provide ample working space.
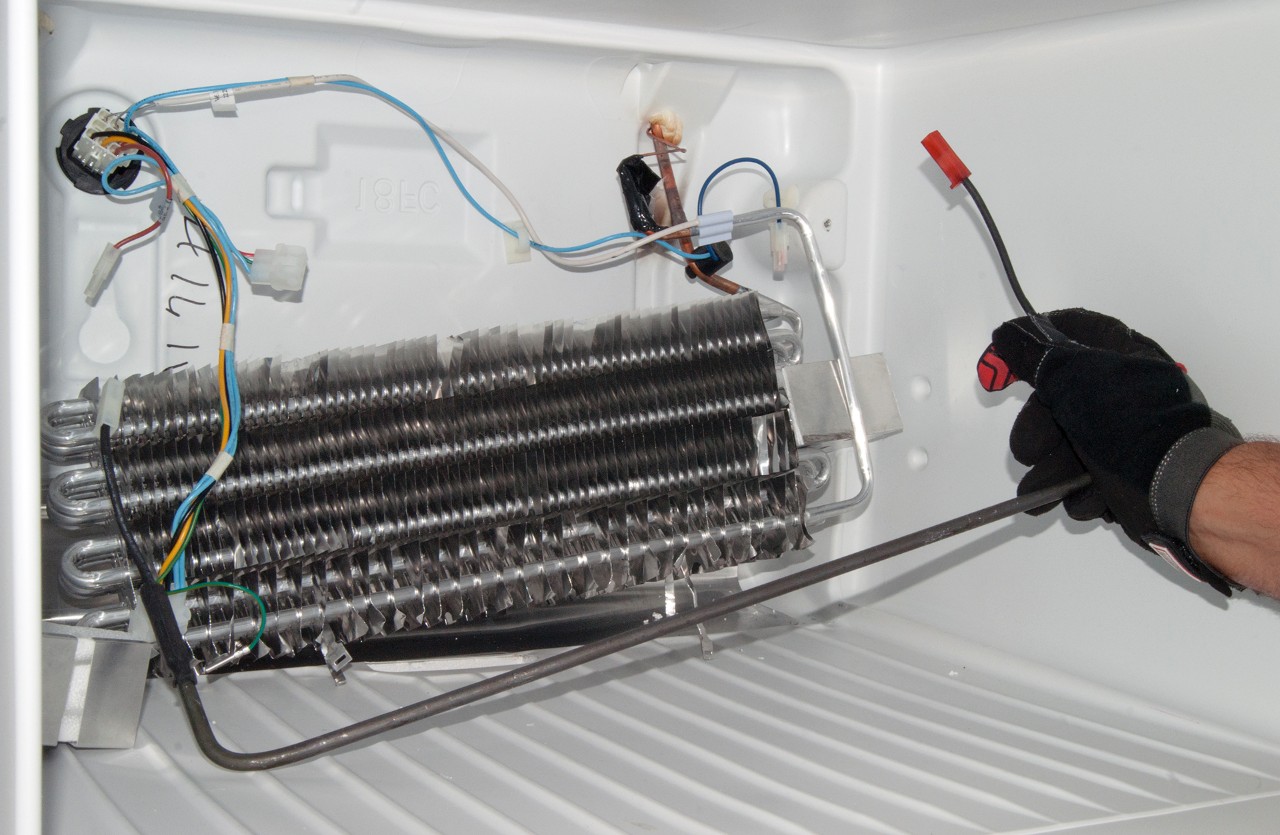
- Remove the Back Panel: Use the screwdriver to remove screws holding the panel inside the freezer. Gently take off the panel to expose the evaporator coils and the defrost heater.
- Remove the Old Defrost Heater: Detach any clips or screws securing the heater. Carefully disconnect the heater from the wiring harness.
- Install the New Defrost Heater: Position the new heater where the old one was located. Secure it with the provided clips or screws and reconnect the wires.
- Reassemble the Freezer: Replace the back panel and secure it with screws. Put back the shelves and any other components you removed.
- Plug in the Refrigerator: Reconnect your refrigerator to the power source and monitor the freezer to ensure it returns to its optimal temperature.
Post-Installation Tips
After replacing the defrost heater, keep an eye on the freezer’s performance over the next few weeks:
- Check for Frost Build-up: Ensure that frost does not accumulate unusually, indicating a successful repair.
- Monitor Temperature Settings: Make sure that the freezer maintains the desired temperature.
- Listen for Unusual Noises: Any strange noises could indicate another underlying issue.
Why Timely Replacement of the Defrost Heater is Important
Maintaining the defrost heater not only ensures the efficient operation of your freezer but also prolongs the life of other components. Here are reasons why timely replacement is crucial:
- Prevents Frost Build-up: Excessive frost can lead to reduced cooling efficiency and strain on the compressor.
- Saves Energy: A freezer that works harder to maintain its temperature due to frost buildup consumes more energy.
- Protects Other Components: Overworking other components due to a faulty defrost system can lead to premature failures, such as a worn-out fan motor or compressor.
Key Takeaways
- Test Before Replacing: Always test the current defrost heater with a multimeter to confirm it’s faulty.
- Proper Tools and Safety: Ensure you have the correct tools and always disconnect the fridge from power before starting your work.
- Follow Installation Steps: Be meticulous with the removal and installation process to avoid any damage to the freezer.
- Monitor Post-Installation: Keep an eye on the freezer’s performance after replacing the defrost heater.
- Understand the Importance: Recognize the critical role a functioning defrost heater plays in the overall health and efficiency of your refrigerator.
By following this guide, not only will you save the cost of a professional repair, but you’ll also extend the life of your Whirlpool top freezer, ensuring it performs at its best. Remember, maintenance is always better than costly repairs or replacements down the line. For more useful tips and appliance advice, keep tuning into TheKitchenApplianceDad.com.