Maintaining a fresh and clean environment inside your refrigerator is essential for preserving the flavor and quality of your food. One key component in achieving this is the air filter. Today, at TheKitchenApplianceDad.com, we’re focusing on how to replace the air filter in an LG refrigerator, a common task that you can do yourself to ensure your appliance runs efficiently and keeps your food fresh longer.
The air filter in a refrigerator helps to remove odors and prevent the buildup of bacteria within the fridge. Over time, these filters can become clogged with particles and lose their effectiveness, which is why it’s important to replace them regularly as recommended by the manufacturer. For most LG models, it’s advised to replace the air filter approximately every six months.
Signs you might need to replace your LG refrigerator air filter include:
If you notice any of these signs, it’s time to consider replacing your filter to maintain the quality and efficiency of your refrigerator.
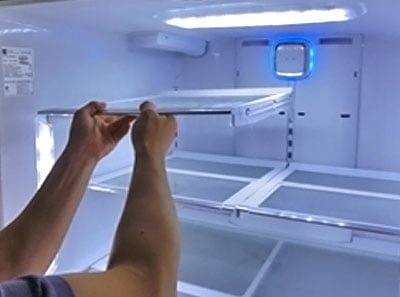
First, you need to find where the air filter is located in your LG refrigerator. Most often, it’s situated in a clearly marked housing in the refrigerator compartment. Common locations include the back, upper right side, or at the middle top of the refrigerator interior.
To remove the old filter, you typically need to open the filter cover. This can usually be done by pushing on the cover tabs or twisting the cover off, depending on the model of your LG fridge. Once the cover is open, take out the old filter. Be sure to handle it by the edges to avoid dispersing any trapped particles.
Before installing a new filter, take it out of its packaging and remove any protective caps or seals. Some filters might need to be prepped before installation, such as rinsing under cold water. Check your specific filter’s instructions to see if any pre-installation steps are required.
Insert the new filter into the slot from which you removed the old one. Make sure it fits securely and that the orientation matches any arrows or indicators that show the proper direction for installation.
Once the new filter is in place, reattach the filter cover by snapping it closed or twisting it into position, depending on your model. Make sure the cover is secure to ensure optimal filter performance.
Some LG refrigerators come equipped with a filter replacement indicator light on the control panel. After installing a new filter, you’ll need to reset this indicator. Typically, this involves pressing and holding a specific button (like the “Filter” or “Reset” button) for a few seconds. Consult your refrigerator’s user manual for exact instructions.
Replacement LG refrigerator air filters are available at most home improvement stores, major retailers, or directly from LG’s online store. Always ensure you buy the correct model specific to your refrigerator. Here are a few links where you can purchase genuine LG filters:
By following these steps, you can easily replace the air filter in your LG refrigerator, ensuring that it continues to work efficiently and keeps your food fresh and tasty. Remember, a small task like replacing the air filter can make a big difference in the performance and longevity of your appliance. Happy filtering from all of us at TheKitchenApplianceDad.com!