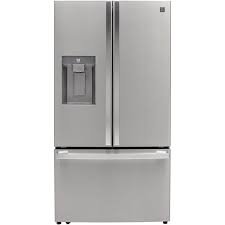
Welcome to TheKitchenApplianceDad.com, where we tackle all your appliance queries with expert advice. Today, we’re diving into a task that might seem daunting at first but is quite manageable with the right guidance: removing and replacing the door handles on your Kenmore freezer. Whether you’re looking to update the look of your freezer or need to replace a broken handle, this step-by-step guide will help you through the process smoothly and safely.
Before we get into the how-to, let’s discuss why you might find yourself needing to remove or replace the handles on your Kenmore freezer. Here are a few common reasons:

To remove and replace the handles on your Kenmore freezer, you’ll need the following tools:
Make sure you have purchased the correct replacement handles that fit your specific Kenmore model. You can usually find this information in your freezer’s manual or by contacting Kenmore customer support.
For safety, it’s essential to unplug your freezer before you start working on it. This prevents any electrical accidents and also makes it easier to maneuver around the appliance.
Examine the handles on your freezer to locate the mounting screws. These are typically found on the inside edge of the handle. In some models, there might be a cover that you need to remove to access the screws.
Using the appropriate screwdriver, remove the screws holding the handle in place. Keep these screws in a safe place, especially if you plan on using them to install the new handles.
Once the screws are removed, gently pull the handle away from the door. It should come off easily. If it resists, check to ensure all screws are fully removed.
Take your new handle and ensure all installation screws or required tools are on hand. Some handles come with specific fittings like washers or bolts, so make sure you have all these components before you start.
Position the new handle on the door where the old one was located. Make sure it’s straight and aligned properly with the door’s surface.
Using the screws you removed earlier (or the new ones provided with your handle), secure the handle in place. Do not over-tighten the screws, as this could damage the handle or the door.
After installation, give the handle a gentle tug to ensure it is securely attached to the freezer door. The handle should be firm with no wiggles or looseness.
Once you’re sure the handle is installed correctly, plug your freezer back in. Check to ensure that the door opens smoothly with the new handle.
Removing and replacing the door handles on your Kenmore freezer is a straightforward process that you can accomplish with just a few tools and steps. By following this guide, you can ensure that your freezer is not only functional but also visually pleasing. Stay tunedto TheKitchenApplianceDad.com for more helpful guides and tips on maintaining and upgrading your kitchen appliances. Happy DIY-ing!

