how-to-remove-the-baskets-in-a-maytag-freezer-easy-guide

How To Remove The Baskets In A Maytag Freezer – Easy Guide

When it comes to organizing and cleaning your Maytag freezer, knowing how to properly remove the baskets can make a significant difference. Not only does it help in efficient cleaning, but it also makes it easier to manage space and store your frozen goods more effectively. At TheKitchenApplianceDad.com, we understand that dealing with appliances should be straightforward and hassle-free. Therefore, in this guide, we’ll walk you through the easy steps to remove the baskets from your Maytag freezer, ensuring you can do it safely and efficiently.

Understanding Your Maytag Freezer Model

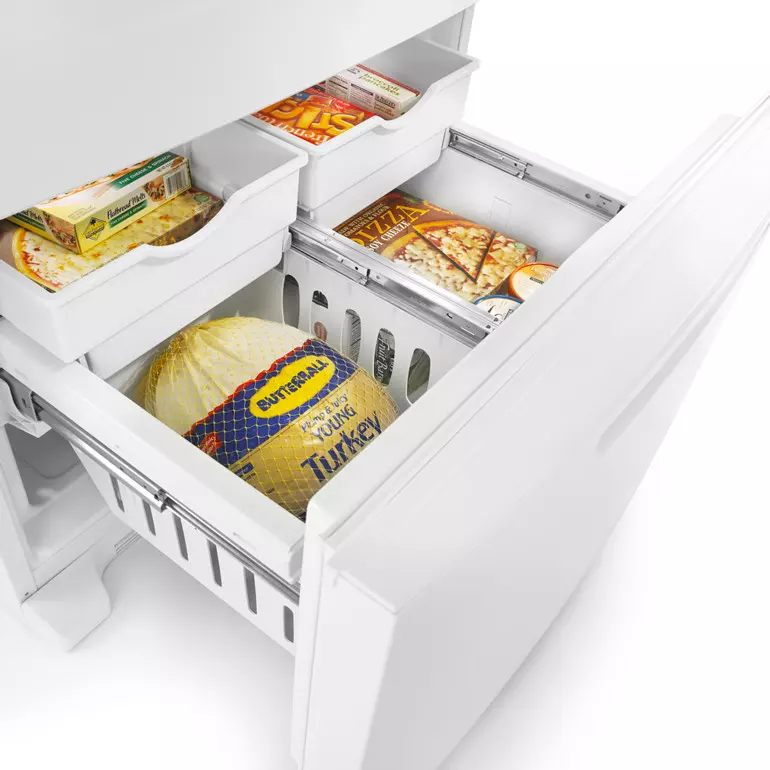
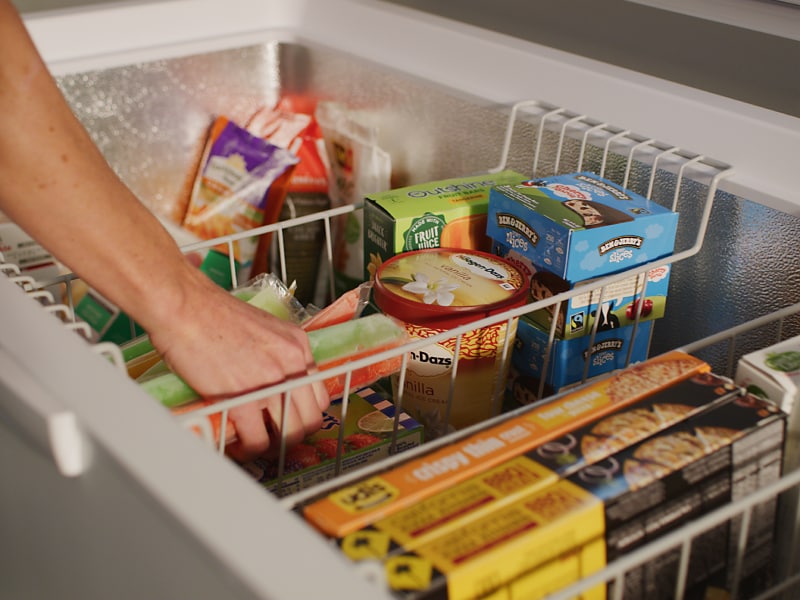
Before we dive into the steps, it’s crucial to identify your Maytag freezer model. Maytag offers a variety of freezer types, including upright freezers and chest freezers, each with its own specific design for the baskets. You can find the model number on the inside wall of the freezer. Once you have this information, you can refer to the user manual for model-specific instructions. If you’ve misplaced your manual, you can easily find a digital version on the Maytag official website.

Freezer Buying Guide: Choosing the Best Freezer | Maytag

Tools You Might Need

Generally, removing freezer baskets doesn’t require any special tools. However, it’s good to have a pair of gloves to protect your hands from the cold and potentially sharp edges of the wire baskets. If your model has a more complex locking mechanism, you might need a standard Phillips head screwdriver.

Step-by-Step Guide to Removing the Baskets

For Upright Freezers:

  1. Unplug the Freezer:
    Safety first! Ensure that your freezer is unplugged or turned off at the circuit breaker to prevent any electrical hazards.
  2. Empty the Basket:
    Remove any items stored in the basket. This will make it easier to handle and prevent any accidental drops of frozen goods.
  3. Locate Release Mechanism:
    Most upright models will have a simple release mechanism, such as a latch or a button, at the ends or sides of the basket. Check your model’s manual for exact details.
  4. Lift and Pull:
    Gently lift the basket as you press the release mechanism. Pull the basket towards you and out of the freezer. Some models might require you to lift the basket at an angle.
  5. Repeat for Additional Baskets:
    If your freezer has multiple baskets, repeat the process for each one.

For Chest Freezers:

  1. Unplug the Freezer:
    As with upright models, make sure the freezer is unplugged to ensure your safety.
  2. Empty the Basket:
    Clear out all items from the basket to make it lighter and easier to remove.
  3. Lift the Basket:
    Chest freezer baskets are typically not attached with any locking mechanisms. Lift the basket straight up and out of the freezer.
  4. Check for Obstructions:
    Sometimes, ice buildup can make it difficult to remove the basket. If this is the case, you might need to defrost your freezer first to remove the ice.

Tips for Cleaning and Maintenance

Once the baskets are removed, it’s a great opportunity to clean both the baskets and the freezer itself. Use a mild detergent and warm water to clean the baskets. Avoid using harsh cleaning agents as they can damage the finish and integrity of the baskets.

For the interior of the freezer, you can use a solution of equal parts water and vinegar. This will help remove any odors and mildew. Make sure to dry everything thoroughly before returning the baskets and food items to the freezer.

Reinserting the Baskets

To put the baskets back into the freezer, simply reverse the removal process. For upright freezers, align the basket with the slides and gently push it back into place until it clicks or you can feel that it’s securely fitted. For chest freezers, just place the basket back inside the freezer cavity.

Key Takeaways

  • Identify Your Model: Knowing your specific Maytag freezer model will help you follow the correct procedures and locate any model-specific mechanisms.
  • Safety First: Always unplug your freezer before attempting to remove the baskets to avoid any electrical hazards.
  • Proper Handling: Empty the baskets before removal to avoid injury or damage to the contents.
  • Cleaning Opportunity: Use the basket removal as a chance to clean and defrost your freezer if necessary.
  • Easy Reinsertion: Reinserting the baskets is straightforward—simply reverse the removal process.

By following these simple steps, you’ll find that removing and reinserting the baskets in your Maytag freezer is a breeze. Not only does it make cleaning your freezer a less daunting task, but it also allows you to reorganize and optimize your freezer space more effectively. For more handy tips and guides on managing your kitchen appliances, keep checking TheKitchenApplianceDad.com.

Meet

Dale

Hi, I'm Dale! With over ten years in high volume restaurants, my journey has taken me through the ins and outs of using, maintaining, and even repairing virtually every kitchen appliance imaginable.

I'm here to share simple, straightforward advice to help you choose and use your kitchen tools effectively. No fluff, just the essential info you need to cook up a storm.