Welcome to TheKitchenApplianceDad.com, where we delve into the world of kitchen gadgets and accessories with a sprinkle of dad wisdom! Today, we’re rolling up our sleeves to tackle a common kitchen conundrum: removing attachments from your KitchenAid mixer. Whether you’re a baking enthusiast or a culinary novice, learning to handle your mixer attachments with ease can make all the difference in your kitchen adventures.
Understanding Your KitchenAid Mixer
Before we get into the nitty-gritty of attachment removal, let’s quickly recap what makes KitchenAid mixers the beloved workhorses they are. Known for their durability and versatility, these mixers come with a variety of attachments, allowing you to knead dough, whip cream, grind meat, and much more. However, the key to using your mixer to its full potential is knowing how to manage these attachments effectively.

Identifying Your Attachment Hub
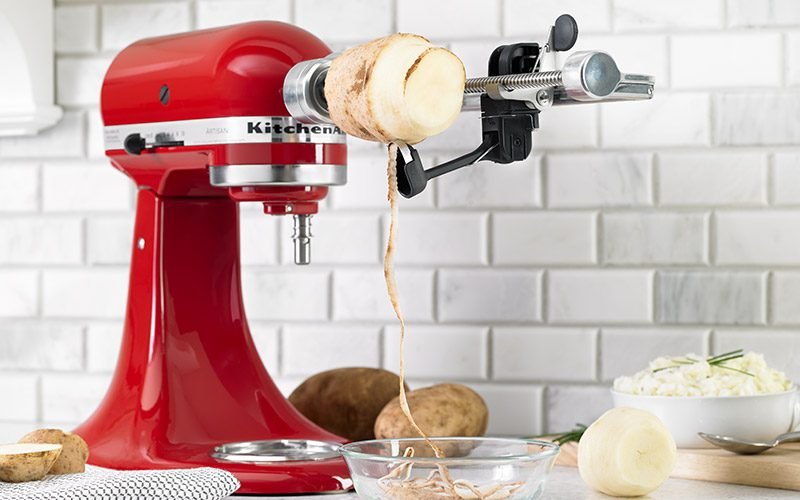
The Hub: At the front of your KitchenAid stand mixer, you’ll find the attachment hub. This is where you can connect a wide range of KitchenAid accessories. It’s typically covered by a cap that you can easily remove by unscrewing or popping it off, depending on your model.
Attachment Types and Their Removal
Paddle, Whisk, and Dough Hook
The most common KitchenAid attachments include the flat beater (or paddle), the wire whip (or whisk), and the dough hook. These are essential for most baking tasks and are designed for quick attachment and removal.
To remove these attachments:
- Turn off and unplug your mixer. Safety first! Always make sure your mixer is off and unplugged before changing or removing attachments.
- Tilt the head back if you have a tilt-head model. For bowl-lift models, ensure the bowl is lowered.
- Press up slightly and turn. For most attachments, you’ll need to push them up slightly and then turn them counterclockwise to unhook them from the beater shaft.
- Pull the attachment off the shaft. Once it’s been twisted free, you can gently pull the attachment off the beater shaft.
Food Grinder, Pasta Roller, and Other Hub Attachments
For attachments that connect to the front hub of your KitchenAid mixer, the removal process is slightly different.
To remove hub attachments:
- Turn off and unplug your mixer. This step is just as important for hub attachments as it is for the beater shaft attachments.
- Remove the hub cover or attachment hub cap. Simply twist and pull to remove the cap, exposing the hub.
- Loosen the attachment knob. This knob is what secures the attachment to the hub. Turn it counterclockwise until the attachment is loose enough to remove.
- Gently wiggle and pull the attachment out of the hub. Sometimes, especially with new mixers or seldom-used attachments, it may be a bit snug. A gentle wiggle will usually coax it out.
Troubleshooting Attachment Issues
Sometimes, attachments can be stubborn. If you’re having trouble, here are a few tips:
- Stuck Beater Attachments: If the paddle, whisk, or dough hook won’t budge, try applying a bit of vegetable oil to the beater shaft to lubricate it. Wait a few minutes, then try again. If it’s still stuck, you might need a soft mallet to gently tap it free.
- Stuck Hub Attachments: If a hub attachment won’t come out, check to make sure the attachment knob is fully loosened. If it is and the attachment is still stuck, apply a small amount of cooking oil to the base of the hub attachment, wait a few moments, and try to remove it again.
- Cleaning After Removal: Once you’ve removed your attachments, it’s a good idea to clean the attachment shaft or hub with a damp cloth to remove any residue. This can help prevent future sticking issues.
Maintenance and Care for Your Attachments
To keep your KitchenAid attachments in top condition, follow these maintenance tips:
- Wash by Hand: While many KitchenAid attachments are dishwasher safe, hand washing in warm, soapy water is often recommended to extend their life.
- Dry Thoroughly: After washing, dry your attachments completely before storing them to prevent rust and corrosion.
- Regularly Check for Wear: Inspect your attachments for signs of wear or damage regularly, especially if you hear any unusual noises during use.
- Storage: Store your attachments in a dry place where they won’t be knocked around or damaged.
Conclusion
Mastering the removal of KitchenAid mixer attachments is a simple yet essential skill for any home chef. By following these steps, you’ll ensure that your mixer remains a versatile and dependable tool in your culinary arsenal. Remember, propermaintenance and handling are key to enjoying the full benefits of your KitchenAid mixer for years to come.
Key Takeaways
- Safety First: Always turn off and unplug your mixer before removing attachments.
- Tilt or Lower the Bowl: Depending on your mixer model, tilt the head back or lower the bowl before removing attachments.
- Press Up and Turn: For beater attachments, press up and turn counterclockwise to remove.
- Loosen the Attachment Knob: For front hub attachments, loosen the attachment knob before wiggling the attachment out.
- Troubleshoot with Care: If attachments are stuck, use vegetable oil for lubrication and if necessary, a soft mallet to gently tap attachments free.
- Maintenance Matters: Hand wash and thoroughly dry attachments, inspect for wear, and store properly to prolong their life.
By keeping these points in mind, you’ll be able to tackle any recipe with ease, knowing that your KitchenAid mixer and its attachments are ready to assist you. At TheKitchenApplianceDad.com, we’re here to ensure that your kitchen experiences are as smooth and enjoyable as your favorite cake batter. Until next time, happy mixing!
Visit KitchenAid’s official site for more information on using and caring for your mixer and attachments.

