Samsung refrigerators are renowned for their reliability, sleek design, and innovative features, including their state-of-the-art ice makers. If you own a Samsung fridge, you might find yourself needing to access the ice maker, whether for routine cleaning, maintenance, or to troubleshoot a problem. Here at TheKitchenApplianceDad.com, we understand that dealing with your appliance’s components might seem daunting. That’s why we’ve put together this comprehensive guide on how to safely and effectively open the ice maker in your Samsung fridge.
Understanding Your Samsung Refrigerator’s Ice Maker
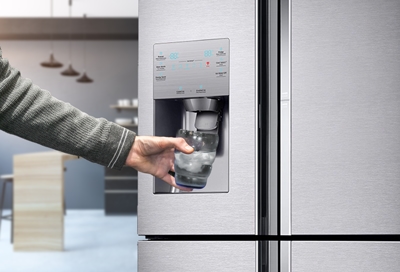
Before you attempt to open the ice maker, it’s essential to know the type of unit you have. Samsung refrigerators typically come with one of two ice maker models: the in-door model or the traditional freezer top model. The in-door model is integrated into the refrigerator door and is more accessible, while the freezer top model is located inside the freezer compartment.

Preparation Steps
Safety First: Always disconnect your refrigerator from the power source before attempting any maintenance. This precaution prevents any electrical accidents and ensures your safety.
Gather Necessary Tools: Depending on your refrigerator model, you might need some basic tools like a screwdriver or a nut driver.
Consult Your Manual: It’s a good idea to consult the user manual for your specific Samsung model. This manual will provide tailored instructions and might include diagrams of your refrigerator’s ice maker. If you’ve misplaced your physical copy, Samsung’s official website typically offers downloadable manuals.
Step-by-Step Guide to Opening the Ice Maker
For In-Door Ice Maker Models
- Locate the Ice Bucket: Open the refrigerator door where the ice dispenser is located. You should see the ice bucket.
- Remove the Ice Bucket: In most models, there will be a button or a lever to release the ice bucket. Press or lift this mechanism and gently pull the ice bucket out.
- Access the Ice Maker: With the ice bucket removed, you should now see the ice maker. There might be a cover that you need to remove. Check for any screws securing this cover and use a screwdriver to remove them.
- Inspect and Service: With the cover off, you can now inspect the ice maker. Look for any signs of ice buildup, misaligned parts, or blockages.
For Freezer Top Ice Maker Models
- Open the Freezer: Pull open your freezer drawer or door.
- Remove the Ice Bucket: Similar to the in-door model, find the latch or button that releases the ice bucket and carefully remove it.
- Unscrew the Ice Maker Cover: Use a screwdriver to remove any screws holding the ice maker cover in place. This step may vary slightly depending on the model.
- Detach the Ice Maker: To fully access the components, you might need to detach the ice maker from its connection. Look for mounting screws and wiring harnesses. If you choose to detach it, ensure you carefully disconnect any wiring connectors.
- Service as Needed: With the ice maker detached, perform any necessary cleaning or maintenance.
Troubleshooting Common Issues
After gaining access to the ice maker, you might encounter common issues such as ice clumping, slow ice production, or no ice production. Here are a few troubleshooting tips:
- Check Water Filters: If your refrigerator has a water filter, make sure it is not clogged as it can restrict water flow to the ice maker.
- Inspect the Water Supply Line: Ensure that the water supply line to the refrigerator is not kinked or blocked.
- Look for Ice Buildup: Sometimes, ice can build up inside the mechanism. Remove any excess ice with care.
- Reset the Ice Maker: Some models feature a reset button. Pressing this can resolve software issues that might be disrupting ice production.
Reassembling Your Ice Maker
Once you’ve finished your maintenance or troubleshooting:
- Reattach any Covers: Replace any covers you removed and secure them with screws.
- Replace the Ice Bucket: Slide the ice bucket back into its original position. Make sure it locks into place.
- Power On: Reconnect your refrigerator to the power supply.
- Test the Ice Maker: Allow some time for the ice maker to start producing ice again. Check to ensure it operates as expected.
Key Takeaways
- Safety First: Always disconnect power before performing any maintenance.
- Know Your Model: Different models have different steps for accessing the ice maker.
- Consult the Manual: Use your model’s manual for specific guidance.
- Troubleshoot Common Problems: Address issues like water filters, supply lines, and ice buildup.
- Reassemble Correctly: Ensure all parts are correctly replaced and secured.
By following these steps, you can efficiently open and service the ice maker in your Samsung refrigerator, ensuring it continues to work efficiently and effectively. Remember, regular maintenance not only helps in smooth operation but also extends the life of your appliance. Whether you’re a seasoned DIY enthusiast or a first-timer, handling your Samsung refrigerator’s ice maker can be a manageable task with the right information and tools. For more tips and guides on handling various kitchen appliances, keep visiting us here at TheKitchenApplianceDad.com. Happy troubleshooting!