Welcome to TheKitchenApplianceDad.com! Today, we’re diving into a common issue that many homeowners face sooner or later: a loose handle on their KitchenAid freezer. Not only can a wobbly handle be annoying, but it can also be a safety hazard, making it difficult to open or close the freezer door properly. Fortunately, tightening a loose KitchenAid freezer handle is a straightforward task that you can usually handle on your own without needing to call in a professional. Let’s walk through the steps to secure that handle back in place.
Before you get started, make sure you have the following tools on hand:
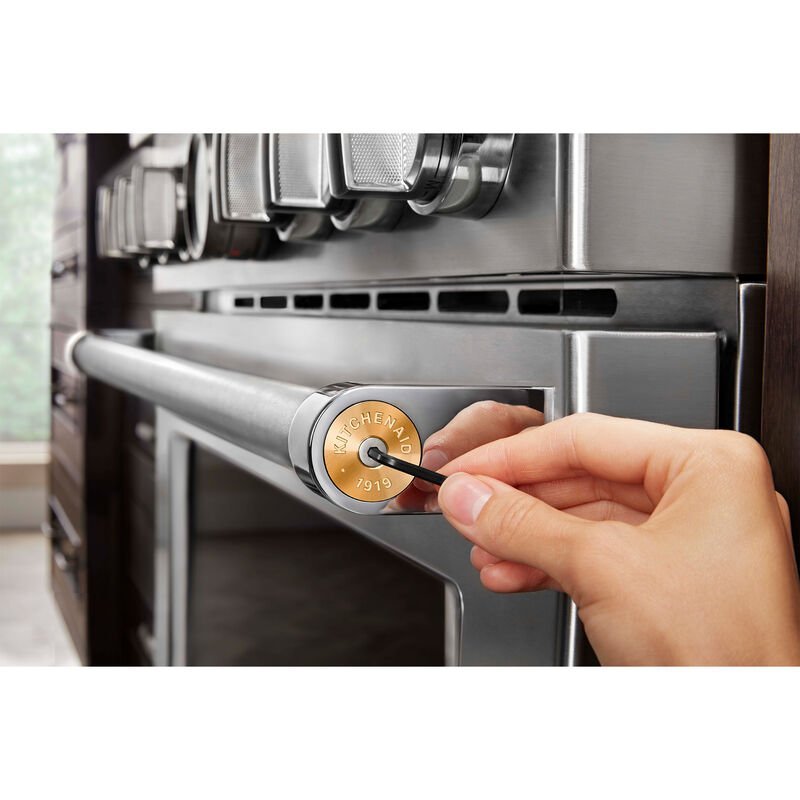
The first step in fixing a loose handle is to locate the set screws that hold it in place. These are usually found on the underside or the sides of the handle. In some KitchenAid models, you might need to remove a trim piece or a cover to access the screws. If this is the case, gently pry off the cover using a flat-head screwdriver, making sure to protect the surface with a soft cloth.
Once you have located the set screws, use the appropriate size Allen wrench to tighten them. Turn the wrench clockwise until the screws are snug, but be careful not to overtighten as this could strip the screws or damage the handle.
If the handle has screws that are accessible with a Phillips-head screwdriver, use the screwdriver to tighten these screws in a similar manner.
After tightening the screws, check the alignment of the handle. Make sure it is straight and aligned properly with the door. A misaligned handle can lead to further issues, including difficulty in operating the door or additional stress on the attachment points.
Once everything looks aligned, give the handle a few gentle tugs to make sure it feels secure. Open and close the freezer door several times to ensure that the handle functions smoothly and doesn’t loosen again quickly.
If you had to remove any covers or trim to access the screws, now is the time to replace them. Make sure they snap back into place securely and that no parts are left loose.
If your KitchenAid freezer is still under warranty, or if you encounter a problem that seems related to a manufacturer defect, it’s a good idea to contact KitchenAid customer support. They can provide guidance and, if necessary, service your appliance under the warranty terms. For more details, visit the KitchenAid support website.
Fixing a loose handle on your KitchenAid freezer is typically a quick and easy task that you can do yourself with just a few tools. By following the steps outlined above, you can ensure that your freezer door is safe and functional. Remember, for any persistent issues or warranty concerns, contacting KitchenAid support is the best course of action. Stay tuned to TheKitchenApplianceDad.com for more helpful guides and tips on keeping your kitchen appliances in top shape!