Maintaining the efficiency and prolonging the life of your refrigerator starts with a task that many of us overlook: cleaning the refrigerator coils. Over time, these coils can accumulate dust, pet hair, and kitchen debris, leading to a decrease in appliance efficiency and an increase in energy consumption. Here at TheKitchenApplianceDad.com, we understand the importance of keeping every component of your kitchen appliances in top shape, and today, we’re diving into how you can clean your refrigerator coils in just five simple steps.
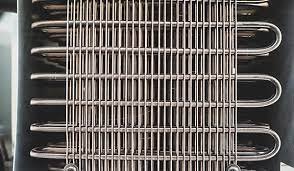
Before we jump into the cleaning process, let’s discuss why this maintenance is crucial. The coils on your refrigerator are responsible for releasing heat as refrigerant passes through them. When these coils are covered in dust and grime, they can’t release heat efficiently, forcing your refrigerator to work harder, which can lead to higher energy bills and a shorter lifespan for your appliance.

Safety first! Always unplug your refrigerator before starting any maintenance work. This will protect you from any electrical hazards and also help save energy as you won’t be opening the fridge during the cleaning process.
Refrigerator coils can either be found at the back or beneath the appliance. If they are at the back, you might need to move the refrigerator away from the wall. If they are underneath, you will likely see a kick plate or grille at the front bottom that needs to be removed. Use a flashlight to help you find the coils.
Using the vacuum cleaner with the brush attachment, start removing the dust and debris from the coils. Be gentle to avoid bending the coil fins, which can restrict airflow and reduce efficiency. If you have a coil cleaning brush, use it to gently remove dust from areas that are hard to reach with the vacuum cleaner.
In many models, especially those with coils underneath, there’s a fan that helps circulate air around the coils to aid in heat release. This area can also gather a lot of dust. Carefully clean around the fan using the vacuum and brush. Avoid touching the fan blades with the vacuum or brush as they can be quite fragile.
Once everything is clean and dust-free, replace any panels or grilles that you had to remove. Move your refrigerator back into place (if you moved it), being careful not to pinch or damage any cords. Plug the refrigerator back in. It’s a good practice to check that it’s functioning correctly after you plug it back in.
Cleaning your refrigerator coils is a simple yet effective way to keep your appliance running efficiently and save on energy costs. As we’ve outlined on TheKitchenApplianceDad.com, this task doesn’t require specialized tools and can be completed in just a few steps. Remember, regular maintenance not only helps in energy conservation but also enhances the longevity of your refrigerator. Happy cleaning!