Welcome to another detailed guide from TheKitchenApplianceDad.com. Today, we’re diving into a common household task that might seem daunting at first but is quite manageable with the right instructions: changing the light bulb in your Whirlpool microwave. Whether your microwave is mounted above your stove or sitting on the countertop, a functioning light bulb is essential for checking the progress of your cooking without opening the door.
Understanding the Importance of Microwave Lighting
Before we get into the specifics of how to change the light bulb, let’s discuss why it’s important to keep your microwave’s light in good working order. The light inside your microwave isn’t just there for functional purposes; it also ensures safety by allowing you to monitor the cooking process. This can prevent overcooking and help in evenly cooking your food by providing a clear view to assess whether your food needs more time.

Safety First!
Before attempting any repairs or maintenance on electrical appliances, safety must be your top priority. Here are some safety tips to follow:
- Unplug the microwave: To avoid any electrical hazards, unplug your appliance before you start.
- Cool down: If you have used the microwave recently, allow it to cool down completely before you begin.
- Use the right tools: Have all your tools and replacement bulbs ready. You’ll typically need a screwdriver and the correct bulb type for your microwave model.
Tools and Materials Needed
- Phillips screwdriver
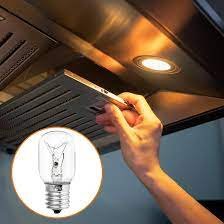
- Replacement light bulb (Check your microwave’s user manual for the correct specification)
Step-by-Step Guide to Changing the Light Bulb in Your Whirlpool Microwave
Step 1: Locate the Light Bulb Cover
The light bulb in a Whirlpool microwave is typically covered by a panel or shield. Depending on your model, this could be inside the cooking chamber or accessible from the outside.
- For models with an interior light bulb: Open the microwave door and locate the light bulb cover on the roof or wall of the microwave.
- For models with an exterior light bulb access: You may need to move the microwave if it’s installed over the range to access the light panel on the top or side.
Step 2: Remove the Cover
- Interior access: Use a Phillips screwdriver to remove the screws holding the cover in place. Carefully take off the cover and set it aside.
- Exterior access: After ensuring the microwave is unplugged and cool, remove the screws on the light cover panel. Be careful as some components might be sensitive to handling.
Step 3: Replace the Bulb
- Remove the old bulb by gently unscrewing it. Do not force the bulb; if it’s stuck, gently wiggle it to loosen.
- Screw in the new bulb carefully but firmly enough to ensure it’s secure. Ensure you do not overtighten as this can damage the bulb.
Step 4: Reassemble the Cover
- Replace the cover and screw it back in place. Make sure it’s secure to avoid any light leaks or loose fittings.
Step 5: Test Your Microwave
- Plug the microwave back in and test the light by opening the door or using the light button (if available). This will confirm whether the bulb replacement has been successful.
Choosing the Right Bulb
When selecting a replacement bulb for your Whirlpool microwave, it’s crucial to choose the correct type. Refer to your microwave’s user manual for the bulb specification, or you can check the manufacturer’s website for details. Generally, most microwaves use a 40-watt appliance bulb, but this can vary.
Troubleshooting Common Issues
If the light doesn’t work after you have replaced the bulb, ensure that:
- The bulb is properly screwed in.
- No fuse has blown in your home’s electrical setup.
- The microwave door is properly closing as some models have a safety feature that prevents the light from working if the door is ajar.
Preventive Measures
To extend the life of your new microwave light bulb:
- Avoid slamming the microwave door. This can cause vibrations that shorten the lifespan of the bulb.
- Keep the microwave clean. Excess dirt or grime can sometimes cause the bulb to overheat.
Key Takeaways
- Safety first: Always unplug your appliance before beginning any maintenance.
- Use the right tools: A proper screwdriver and the correct bulb are essential.
- Follow the steps: Locate the cover, remove it, replace the bulb, and reassemble everything.
- Check your model specifics: Refer to your user manual for the exact bulb needed for your Whirlpool microwave.
- Test after replacing: Always test your microwave after changing the bulb to ensure functionality.
Changing the light bulb in your Whirlpool microwave is a simple yet crucial task that ensures the functionality and safety of your appliance. By following these steps, you can easily maintain thelighting of your microwave, enhancing the overall cooking experience. Remember, if you encounter any significant difficulties or if the light continues to fail after replacement, it might be a sign of a more complex electrical issue, in which case contacting a professional technician or Whirlpool support is advisable.
For more helpful tips and guides on managing your kitchen appliances, keep visiting us at TheKitchenApplianceDad.com. Whether it’s routine maintenance or tackling more complex repairs, we’re here to help make every kitchen task manageable and safe. Happy cooking!