
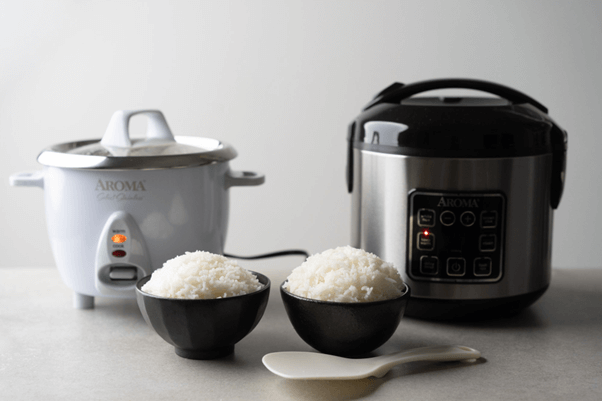
Welcome to TheKitchenApplianceDad.com, where we dive into the world of kitchen gadgets to make your culinary adventures both enjoyable and effortless. Today, we’re focusing on a staple in many kitchens around the globe: the Aroma Rice Cooker. Whether you’re a rice aficionado or a novice looking to perfect your grain game, this guide will walk you through the simple yet effective steps to using your Aroma Rice Cooker for fluffy, perfectly cooked rice every time.
Before we get into the nitty-gritty of how to use your rice cooker, let’s understand what makes the Aroma brand so special. Aroma rice cookers are known for their consistent results, ease of use, and multifunctional capabilities. They can do more than just cook rice – many models also steam vegetables, cook stews, and even bake cakes.
The first step to using your Aroma Rice Cooker is to measure out your rice. Use the measuring cup that comes with your rice cooker for best results. This is because the cup sizes can differ from standard U.S. measuring cups. Typically, one Aroma cup is about 3/4 of a standard U.S. cup.
It’s essential to rinse your rice to remove excess starch, which can cause the rice to be too sticky or clump together. Place the rice in a fine-mesh strainer and run it under cold water until the water runs clear.
After rinsing, add the rice to the cooking pot of your Aroma Rice Cooker. Then, fill with water to the corresponding water level line inside the pot. If your rice cooker doesn’t have these lines, a general rule of thumb for white rice is a 1:1.5 ratio of rice to water. For brown rice, it’s typically 1:2.
This step is optional but can add flavor to your rice. You can add a pinch of salt, a pat of butter, or even a splash of chicken or vegetable broth in place of some of the water for more savory rice.
With your rice and water in the pot, close the lid securely. Plug in your Aroma Rice Cooker and select the appropriate cooking setting. For white rice, use the “White Rice” setting, and for brown rice or other whole grains, select the “Brown Rice” setting. If your model has a “Quick Rice” function, you can use this for faster cooking times, though it may not yield the softest rice.
Once you’ve selected the correct setting, simply press the “Cook” button. The rice cooker will do the rest. The built-in sensors will detect when the rice is done and automatically switch to “Keep Warm.”
Some Aroma models come with a steaming tray that can be inserted above the rice. You can steam vegetables or cook other foods like fish or chicken simultaneously as the rice cooks below. Just ensure that the steam tray is in place before starting the rice cooker.
Once the cooking cycle is complete, let the rice sit for about 10 minutes in the “Keep Warm” mode. This allows the rice to settle and firm up a bit, making it easier to fluff.
Use the plastic paddle that came with your rice cooker or a wooden spoon to gently fluff the rice. This separates the grains and releases excess steam, preventing the rice from becoming mushy.
After fluffing, your rice is ready to be served. Whether you’re pairing it with a stir-fry, using it as a base for a rice bowl, or enjoying it as is, you’ve now got perfectly cooked rice.
Before cleaning, unplug your Aroma Rice Cooker and allow it to cool down. Never submerge the main body of the cooker in water.
The non-stick inner pot can usually be removed for easy cleaning. Wash it with warm soapy water or place it in the dishwasher if it’s dishwasher-safe.
With a damp cloth, wipe down the exterior of the rice cooker and the lid. If there’s any stuck-on rice, use a soft sponge to gently scrub it away without scratching the non-stick surface.
Sometimes, you might run into issues with your rice not turning out as expected. Here are a few tips to troubleshoot common rice cooker problems:
Using an Aroma Rice Cooker is a straightforward process that yields delicious results. With the push of a button, you can have perfectly cooked rice without the hassle of monitoring a pot on the stove. Remember to measure and rinse your rice, add the correct amount of water, select the right setting, and fluff before serving. With this step-by-step guide, your Aroma Rice Cooker is sure to become your go-to kitchen companion for all your rice-cooking needs.
And remember, for more tips, tricks, and guides on kitchen appliances, keep visiting us here at TheKitchenApplianceDad.com, where we’re always cooking up something new for you.
Whether you’re a seasoned chef or just starting out in the kitchen, we hope this guide helps you make the most out of your Aroma Rice Cooker. Happy cooking!

