Welcome to TheKitchenApplianceDad.com, where we delve deep into the world of kitchen gadgets to make your culinary experiences smoother and more enjoyable. Today, we’re putting the spotlight on a small, often overlooked, yet crucial component of your kitchen routine: the microwave filter. Specifically, we’re focusing on GE microwaves, renowned for their quality and durability. A clean and functional filter is essential for your microwave to operate at its best, so let’s explore the types of filters you’ll find in GE microwaves and how to replace them when the time comes.
GE microwaves typically use two types of filters:
It’s crucial to maintain both types of filters to ensure your microwave functions efficiently and to maintain good air quality in your kitchen.
For Charcoal Filters:
For Grease Filters:
Step 1: Unplug Your Microwave
For safety reasons, always unplug your microwave before attempting any maintenance.
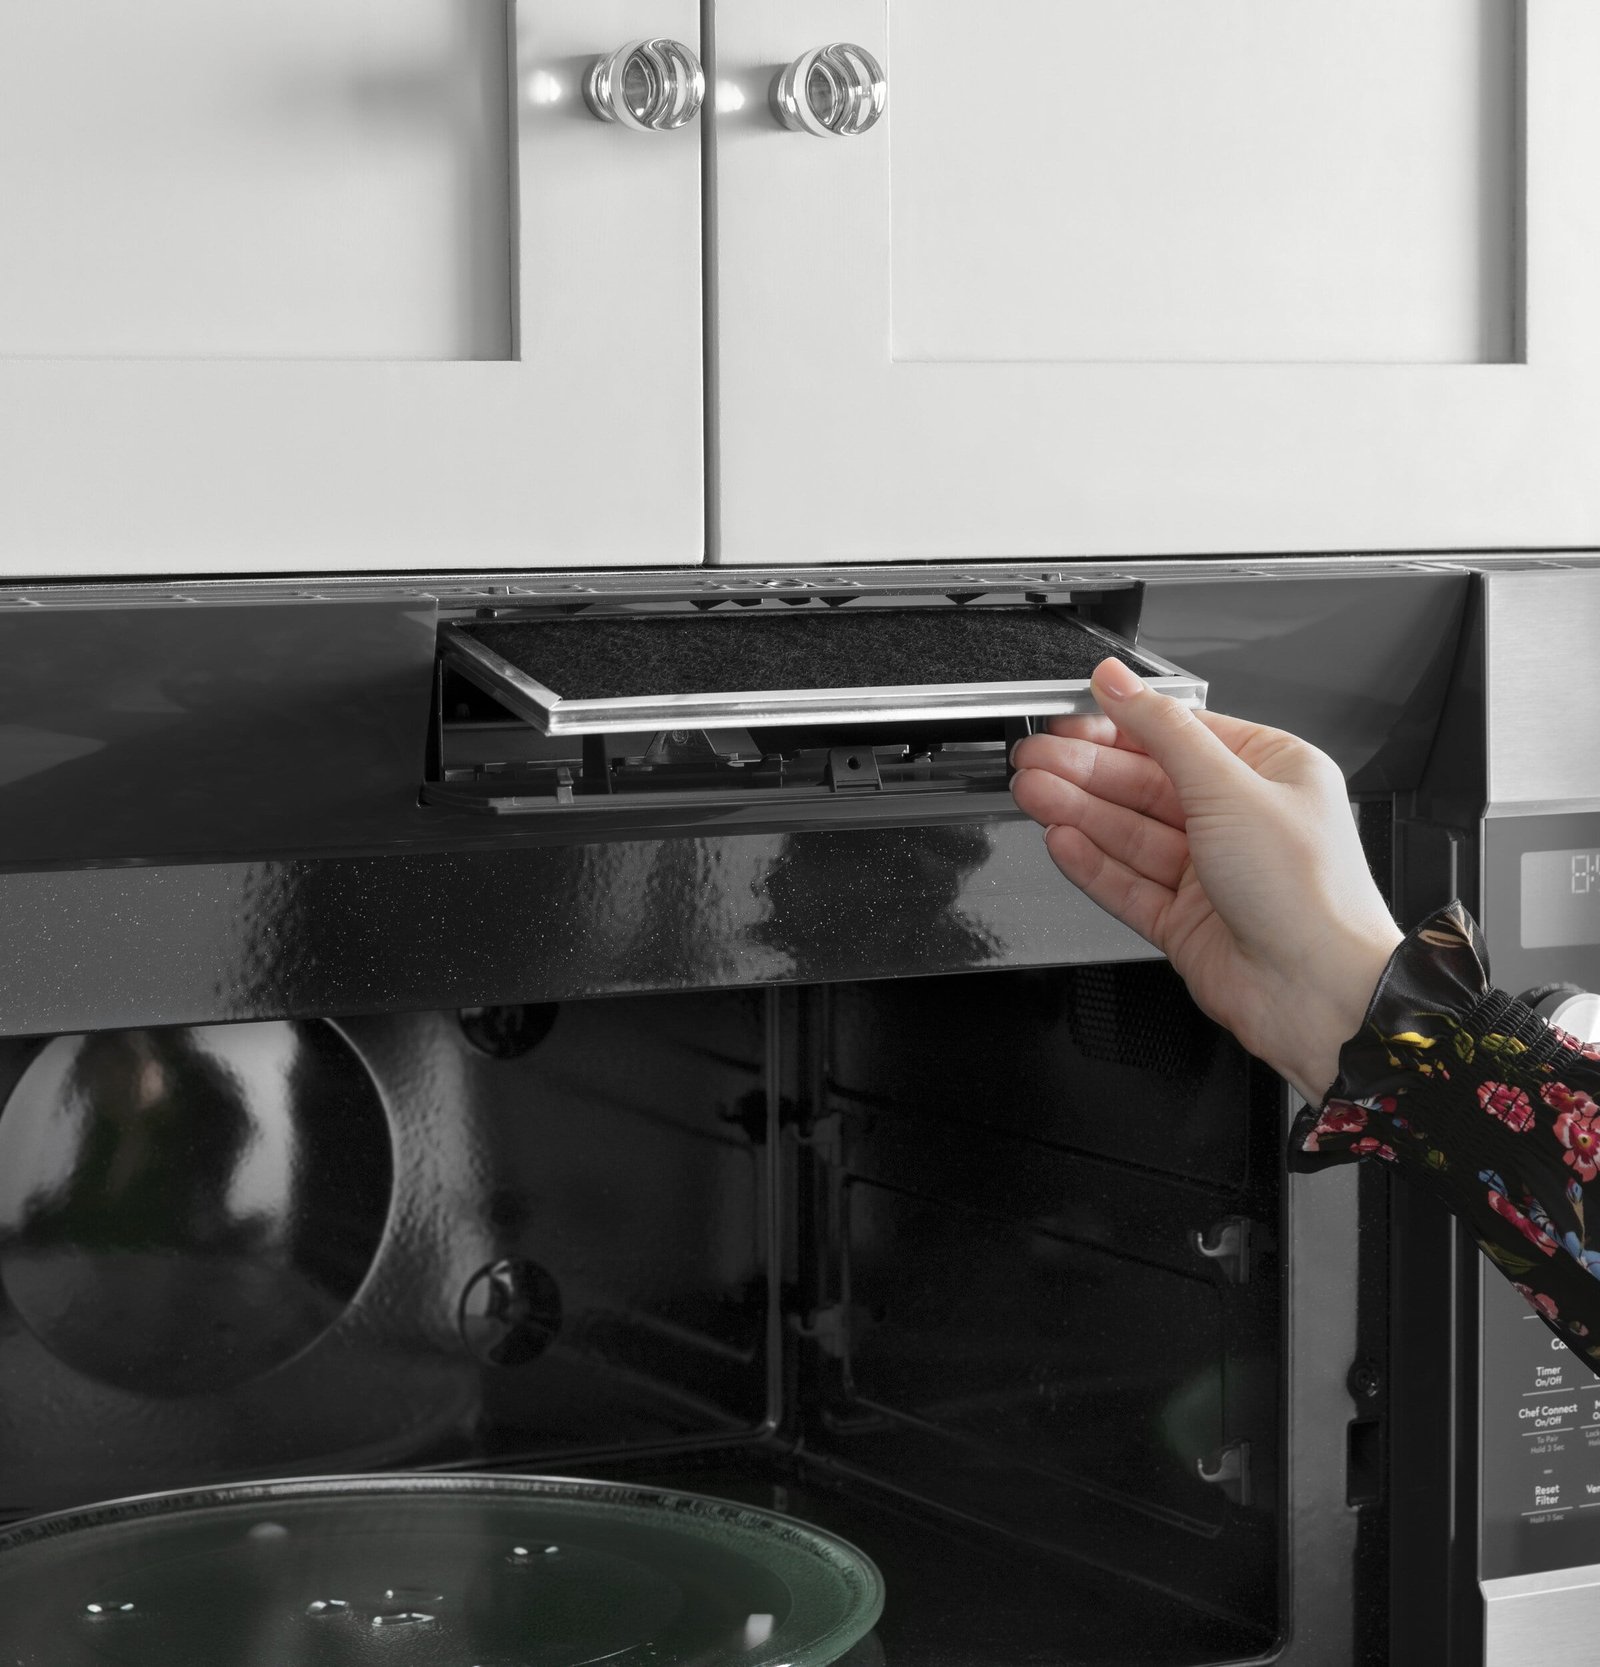
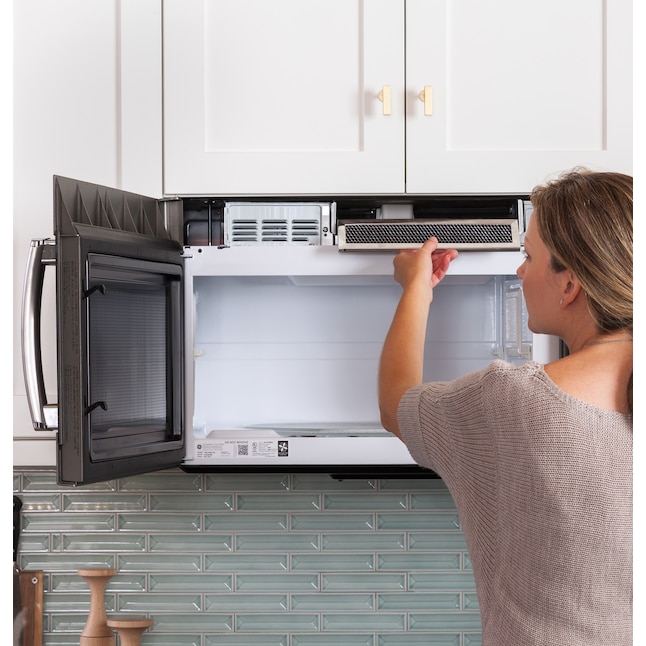
Step 2: Locate the Filter
On most GE over-the-range microwaves, the charcoal filter is located behind the grille at the top of the microwave. You may need to remove screws to access it, so have a screwdriver handy.
Step 3: Remove Old Filter
Carefully remove the old filter. If it’s held in place by clips or tabs, gently release these to avoid breaking them.
Step 4: Insert New Filter
Place the new charcoal filter where the old one was. Make sure it fits snugly and that any clips or tabs are securely fastened.
Step 5: Replace the Grille and Plug In
Once the new filter is in place, reattach the grille and screw it in if necessary. Then plug the microwave back in, and you’re good to go.
Step 1: Unplug Your Microwave
Safety first! Unplug your microwave before starting the filter replacement process.
Step 2: Locate the Filter
Grease filters are typically found on the bottom of over-the-range microwaves. Slide them out or pop them down depending on the model.
Step 3: Remove Old Filter
Carefully slide out or lower the old grease filter. If there’s a lot of buildup, consider wearing gloves to keep your hands clean.
Step 4: Insert New Filter
Slide the new grease filter into place. It should fit securely without any forcing.
Step 5: Plug In Your Microwave
With the new filter installed, you can plug your microwave back in and resume use.
You can buy replacement filters directly from GE Appliances or from reputable appliance parts stores both online and offline. Here are a few options to consider:
Always ensure that you purchase the correct model-specific filter for your GE microwave.
Maintaining and replacing the filters in your GE microwave is a simple but essential task to keep your kitchen appliance running smoothly and your cooking environment clean. Regular upkeep of the filters not only ensures the longevity of your microwave but also contributes to a healthier cooking space by reducing odors and trapping grease particles.
At TheKitchenApplianceDad.com, we understand that every little piece of knowledge can empower you to take better care of your appliances and, by extension, your home and family. We hope this guide has shed light on the significance of microwave filters and demystified the process of replacing them.
Remember, taking care of your GE microwave’s filters isn’t just about maintenance; it’s about ensuring a pleasant cooking experience and safeguarding the air quality in your home kitchen. Keep this guide bookmarked for when it’s time to replace your filters, and feel free to explore TheKitchenApplianceDad.com for more insightful tips and appliance wisdom. Happy cooking, and here’s to many more delicious meals made in a clean and fresh kitchen environment!