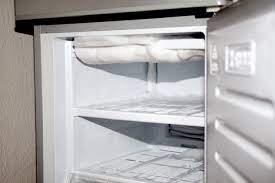
When it comes to maintaining your kitchen appliances, sometimes the smallest issues can cause the biggest headaches. One such nuisance is a frozen drain in your GE freezer. This common problem can lead to water leaks, ice buildup, and eventually, a malfunctioning freezer. At TheKitchenApplianceDad.com, we understand how important it is to keep all your appliances running smoothly. That’s why we’ve put together this detailed guide to help you fix a frozen GE freezer drain quickly and efficiently.
Before diving into the solution, it’s crucial to understand why freezer drains freeze. In most GE freezers, the drain is designed to channel defrost water out of the freezer and into a drain pan where it evaporates. However, if the drain is blocked with food particles, ice, or debris, this water can back up and freeze, leading to blockages that disrupt the normal operation of your freezer.
To tackle this problem, you’ll need a few basic tools and materials:

Safety first! Always unplug the appliance before performing any maintenance. This prevents any electrical accidents and ensures your safety throughout the process.
Take out all the food items from your freezer. Store them in a cooler or another freezer to keep them from thawing while you work on the drain.
In most GE freezers, the drain is located at the bottom of the freezer compartment. You might need to remove the freezer’s back panel or the floor panel to access it. Use a screwdriver if necessary, and be careful not to damage any components.
Using a hairdryer or a heat gun, gently apply heat to melt any ice that has formed inside and around the drain. Be careful not to use excessive heat as it can damage the interior of the freezer.
Once the ice is melted, use a turkey baster or a small funnel to pour hot water down the drain. This will help flush out any debris that might be causing the blockage. Repeat this process a few times until you see the water freely flowing into the drain pan below the freezer.
Dry any excess water in the freezer compartment with a towel. Replace any panels you removed during the process and put all the food items back into the freezer.
Once everything is back in place, plug in your freezer and monitor it for a day to ensure that the issue is resolved and the freezer is functioning correctly.
Preventative maintenance is key to avoiding future issues with your GE freezer drain. Here are a few tips:
For more detailed instructions specific to your GE freezer model, you can consult the owner’s manual or visit the GE Appliances support website. They offer manuals, troubleshooting guides, and more that can be helpful.
Frozen drains in your freezer can be a frustrating issue, but with the right tools and a bit of patience, they can be resolved easily. Remember, regular maintenance not only extends the life of your appliances but also ensures they run efficiently. Keep these tips from TheKitchenApplianceDad.com in mind, and your GE freezer should continue to function smoothly for years to come.

