Welcome to TheKitchenApplianceDad.com, where today we’re tackling a common household annoyance: a broken light in your Whirlpool freezer. Not only can a malfunctioning light bulb make it hard to find what you’re looking for, but it can also be a sign to check and maintain other parts of your freezer. In this comprehensive guide, we’ll walk you through the steps to fix the light and discuss the best types of bulbs to use for replacement.
Before diving into the repair process, it’s important to understand a bit about the lighting in your Whirlpool freezer. Most modern Whirlpool freezers use LED lighting for its efficiency and longevity. However, older models might still use traditional incandescent bulbs. Identifying which type you have is crucial because it affects how you handle the replacement.

Safety first! Always unplug your appliance before attempting any repairs. This prevents any risk of electric shock or damage to your freezer.
For most Whirlpool freezer models, the light bulb is located at the top of the unit. You might need to remove a cover or panel to access it. This can typically be done with a screwdriver or by gently prying it off with a putty knife.
Once you have access, carefully remove the old bulb. If it’s an LED unit, it might be secured with screws or clips. An incandescent bulb usually unscrews like a standard light bulb.
Check the bulb or your freezer’s manual for the type and wattage. It’s crucial to replace the bulb with one of the same type and similar wattage to avoid any electrical issues or damage to the socket.
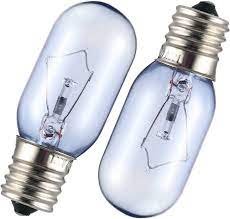
With the details of the bulb in hand, head to your local hardware store or order online. For Whirlpool freezers, you’ll often need a bulb that fits specific criteria. Here are a couple of recommendations:
Ensure the bulb is compatible with your model. If unsure, consult with a sales expert or refer back to your freezer’s manual.
Carefully install the new bulb by screwing it in or securing it with the necessary clips or screws. Make sure it is snug and secure.
Replace any covers or panels you removed, plug the freezer back in, and open the door to test the new light. It should light up immediately. If not, double-check your installation or consult with a professional.
Regular Checks: Make it a habit to check the functionality of your freezer’s light periodically. This is especially important in a high-use environment.
Clean the Light Cover: Occasionally clean the light cover to ensure it remains clear and unobstructed. This helps maximize the light spread inside your freezer.
Avoid Slamming the Freezer Door: Frequent hard closing of the freezer door can loosen the light bulb or its connections. Close the door gently to extend the life of the bulb.
If after replacing the bulb, the light still fails to work, there might be an underlying electrical issue. In such cases, it’s advisable to call in a professional technician to diagnose and fix the problem. This ensures your freezer’s warranty remains intact and prevents any further damage.
Fixing a broken light in your Whirlpool freezer is typically a quick and easy process. By following these steps and choosing the right bulb, you can ensure yourfreezer remains functional and efficient. Remember, a well-lit freezer not only helps you find your frozen treats faster but also enhances the overall functionality of your appliance. Stay tuned to TheKitchenApplianceDad.com for more tips and tricks on keeping your kitchen appliances in top shape!