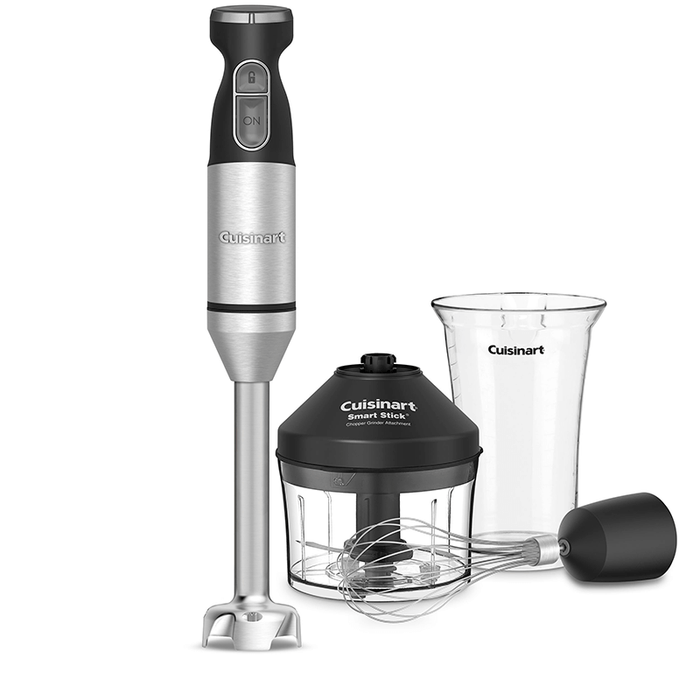
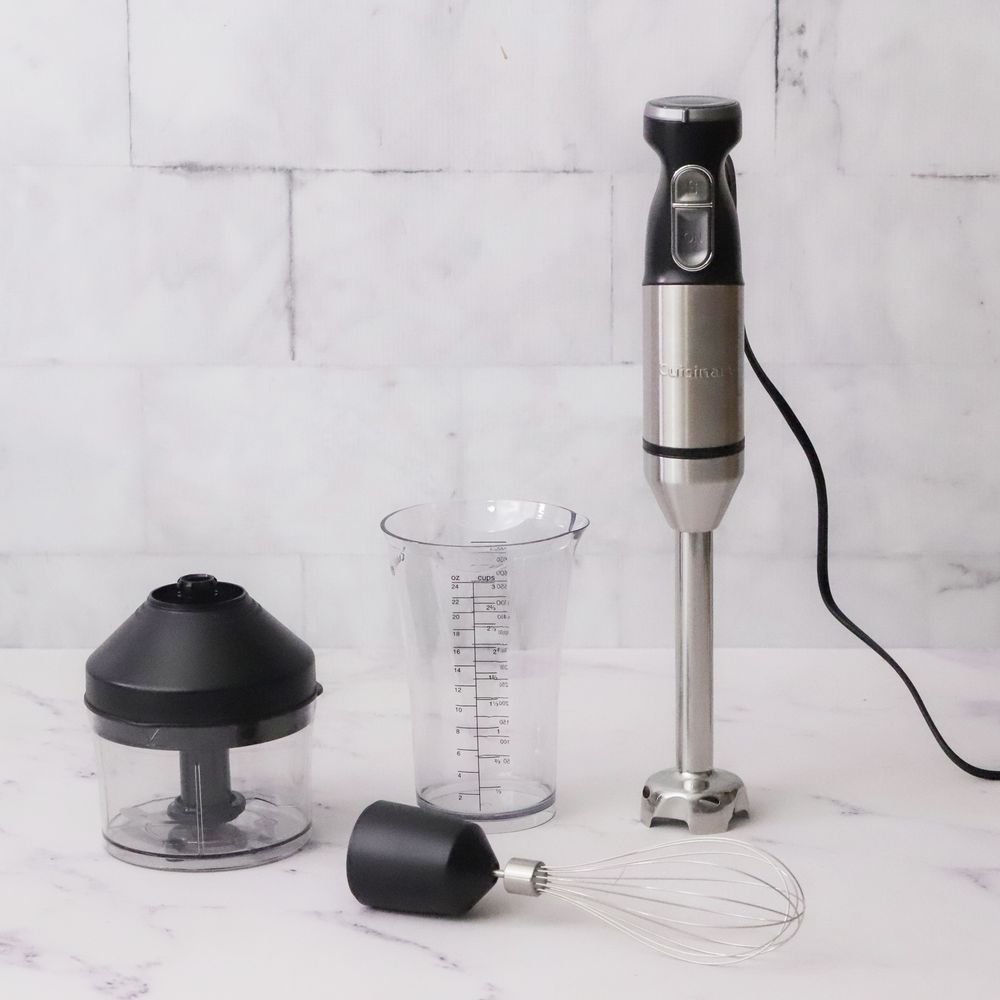
When it comes to kitchen gadgets that blend convenience with functionality, the Cuisinart Immersion Blender is a versatile tool that should be a staple in every home cook’s arsenal. Whether you’re a seasoned chef or just starting out in the kitchen, the immersion blender can help you whip up everything from smoothies and soups to sauces and baby food with ease. At TheKitchenApplianceDad.com, we understand that getting started with new kitchen appliances can sometimes feel a bit daunting. That’s why we’ve put together this comprehensive guide to using your Cuisinart Immersion Blender.
Unboxing Your Cuisinart Immersion Blender
First things first, let’s get your immersion blender out of the box and ready for its first use. Inside, you’ll typically find the motor body, blending shaft, and any additional attachments or accessories that come with your specific model, such as a whisk or chopper attachment.
What You’ll Find in the Box:
- Motor body: This is the main part of the blender where the motor is housed.
- Blending shaft: Often made of stainless steel, this is the part you’ll submerge into your food or liquids to blend.
- Attachments: Depending on your model, you may have a whisk attachment, chopper/grinder attachment, or a measuring beaker.

Preparing for the First Use
Before you dive into blending, it’s a good idea to wash all the detachable parts in warm, soapy water. Although these parts are often dishwasher safe, a gentle hand wash for the first time can ensure they are perfectly clean and ready for food preparation.
Getting to Know Your Cuisinart Immersion Blender
Understanding the features of your blender will help you make the most of it. Here’s a quick rundown of the key components:
- Power button: This turns the blender on and off.
- Speed control dial or buttons: These allow you to adjust the speed of the blender to suit the task at hand.
- Lock/unlock button: Some models have a safety lock feature to prevent accidental operation.
- Blending attachment: This can be easily attached or detached from the motor body for cleaning.
Step-by-Step Guide to Using Your Blender
Blending Soups and Sauces
- Prepare Your Ingredients: Chop your ingredients into smaller pieces. This will make it easier for the blender to create a smooth texture.
- Safety First: Always ensure that the blending shaft is securely attached to the motor body.
- Start Slow: Begin blending on the lowest speed setting and gradually increase as needed.
- Submerge and Blend: Insert the blending shaft into the pot or container, making sure the blade is fully submerged to prevent splattering.
- Move Around: Gently move the blender around and up and down to ensure all ingredients are blended evenly.
- Hot Liquids Caution: When blending hot liquids, remove the pot from the heat source and allow it to cool slightly before blending to avoid burns or spills.
Making Smoothies and Purees
- Load the Container: Place your fruits, vegetables, liquids, and any other ingredients into a tall container or beaker.
- Pulse to Start: Use the pulse function (if available) to start breaking down the larger pieces.
- Increase Speed: Once the ingredients start to blend, increase the speed to create a smooth texture.
- Steady Motion: Keep the blade moving through the mixture to avoid creating air pockets and to ensure a consistent blend.
Whipping Cream or Egg Whites
- Use the Whisk Attachment: If your model comes with a whisk attachment, attach it to the motor body.
- Choose the Right Container: Use a deep bowl to prevent splattering.
- Whisk Away: Start on a low speed and increase as the mixture begins to thicken to achieve the desired consistency.
Chopping Nuts, Herbs, or Vegetables
- Use the Chopper Attachment: If included, attach the chopper bowl to the motor body.
- Add Ingredients: Place your herbs, nuts, or vegetables into the chopper bowl.
- Pulse to Chop: Use the pulse function for controlled chopping until you reach the desired size.
Tips for Success
- Don’t Overfill: Avoid filling your container too full to prevent overflow and ensure an even blend.
- Use the Guard: The blade guard helps prevent scratching pots and bowls, so make sure it’s always attached when blending.
- Read the Manual: Familiarize yourself with the specific instructions and safety features of your model.
Cleaning and Maintenance
After each use, it’s essential to clean your immersion blender to keep it in top shape. Most Cuisinart Immersion Blenders have detachable# Beginners Guide: How to Use a Cuisinart Immersion Blender
Welcome to TheKitchenApplianceDad.com, your go-to resource for all things kitchen appliances. Today, we’re diving into the world of immersion blenders, specifically focusing on the Cuisinart brand, a household name known for quality and durability. If you’ve recently acquired a Cuisinart Immersion Blender or are considering adding one to your culinary toolkit, this guide will walk you through the basics, ensuring you get the most out of your new appliance.
Understanding Your Cuisinart Immersion Blender
Cuisinart immersion blenders are designed with the home chef in mind, featuring user-friendly controls and versatile attachments that make kitchen tasks a breeze. Before we delve into how to use the blender, let’s familiarize ourselves with its main components:
- Motor body: This houses the motor and contains the controls for operation.
- Blending shaft: A long, narrow attachment with a blade at the end that does the blending.
- Attachments: Depending on the model, your blender may come with a whisk, a chopper attachment, or a measuring cup.
Setting Up Your Blender for the First Time
Upon unboxing your Cuisinart Immersion Blender, it’s crucial to give it a thorough clean. Wash the detachable parts in warm, soapy water or place them in the dishwasher if they are dishwasher-safe. Once dry, you’re ready to assemble and use your blender.
Assembling Your Blender
- Connect the Blending Shaft: Attach the blending shaft to the motor body by aligning the two parts and gently twisting until they lock into place.
- Secure Attachments: If your recipe calls for a specific attachment, like the whisk or chopper, make sure it’s securely fastened to the motor body.
Operating Your Cuisinart Immersion Blender
Basic Blending Techniques
- Powering On: Plug in the blender and press the power button (if applicable) to turn on the unit.
- Adjusting Speed: Use the speed control dial or buttons to select the desired speed. Start on a lower setting to prevent splattering and increase as needed.
- Submersion: Gently insert the blade end of the blending shaft into the mixture, ensuring it’s fully submerged to avoid splashes.
- Blending: Turn on the blender and move it in a slow, steady, up-and-down motion to blend the ingredients thoroughly.
- Powering Off: Once you’ve achieved the desired consistency, release the power button or switch off the unit before removing the blending shaft from the mixture.
Blending Hot Liquids
When working with hot liquids, such as soups or sauces, extra caution is needed:
- Allow Cooling: Let the liquid cool slightly before blending to reduce the risk of burns or explosions.
- Use a Deep Pot: To prevent splatter, blend in a deep pot or container.
- Venting: If using a lid, ensure it’s vented to allow steam to escape.
Using Attachments
Whisk Attachment
- Assembly: Attach the whisk to the motor body.
- Use: Whip cream, egg whites, or light batters on a medium to high speed until the desired consistency is reached.
Chopper Attachment
- Assembly: Place the chopper attachment onto the motor body.
- Use: Pulse to chop vegetables, nuts, or herbs. Be careful not to over-process.
Cleaning and Maintenance
After use, it’s important to clean your Cuisinart Immersion Blender promptly:
- Detach: Remove the blending shaft or other attachments from the motor body.
- Wash: Hand wash in soapy water or use the dishwasher if safe to do so.
- Dry: Allow all parts to dry completely before reassembling and storing.
Safety Tips
- Never Immerse the Motor Body: The motor body should never be placed in water or any other liquid.
- Blade Caution: The blades are sharp; handle with care, especially when cleaning.
- Unplug When Not in Use: Always unplug the blender when it’s not being used.
Troubleshooting Common Issues
If you encounter problems, here are a few tips:
- Blender Won’t Start: Ensure it’s plugged in and the power button is pressed. Check your home’s circuit breaker if necessary.
- Inconsistent Blending: Move the blender more thoroughly through the mixture or add more liquid to assist the blending process.
- Attachment Won’t Fit: Double-check that you’re using the correct attachment and that it’s aligned properly before twisting it into place.
Conclusion
The Cuisinart Immersion Blender is a fantastic tool that can simplify many kitchen tasks, from pureeing soups to whipping up smoothies. With the right techniques and a bit of practice, you’ll be able to use your immersion blender to its
full potential. Remember to prioritize safety, keep the appliance clean, and experiment with different attachments to explore the full range of culinary possibilities.
Key Takeaways
- Familiarize Yourself with Parts: Learn the components of your Cuisinart Immersion Blender – the motor body, blending shaft, and any attachments.
- Initial Cleaning: Wash detachable parts before first use.
- Assemble Correctly: Ensure the blending shaft is securely attached to the motor body.
- Start Slow: Begin blending on the lowest speed and increase gradually.
- Move and Submerge: For even blending, move the blender through the mixture and keep the blade submerged.
- Cool Hot Liquids: Allow hot mixtures to cool slightly before blending.
- Use Attachments Wisely: Choose the right attachment for the job – whisk for whipping or chopper for chopping.
- Stay Safe: Never immerse the motor body in liquid and handle blades with care.
- Clean Promptly: Clean the blender after each use to prevent food buildup and maintain hygiene.
- Troubleshoot Effectively: If the blender doesn’t start, check the power connection and assembly.
By following this guide, you’re well on your way to making the most of your new kitchen companion. The Cuisinart Immersion Blender is a tool that, once mastered, will open up a world of culinary creativity and efficiency. Enjoy the process of blending, chopping, and whipping your way to delicious dishes.
Remember to visit us at TheKitchenApplianceDad.com for more insights, guides, and reviews on all your favorite kitchen gadgets. Whether you’re looking for new recipes to try out with your immersion blender or advice on the latest kitchen appliances, we’ve got you covered. Happy blending!


