At TheKitchenApplianceDad.com, we understand the importance of keeping your kitchen appliances in top shape. One crucial aspect of refrigerator maintenance is the cleaning of the condenser coils. This not only ensures efficient performance but also prolongs the life of your appliance. Today, we’re focusing on how to clean Whirlpool fridge coils, a task that is often overlooked but can significantly impact the efficiency of your refrigerator.
Over time, the condenser coils of your Whirlpool fridge can accumulate dust, pet hair, and other debris. This buildup can restrict airflow, forcing your refrigerator to work harder, which can lead to increased energy consumption and a shorter lifespan for your fridge. Regularly cleaning these coils can improve energy efficiency, reduce operating costs, and prevent unexpected failures.

Before you begin the cleaning process, it’s important to gather the right tools and materials:
To ensure your safety and protect your appliance from any electrical issues, always start by unplugging your refrigerator from the power source.
For most Whirlpool refrigerator models, the condenser coils are located at the bottom, though some models might have them at the back. If they’re at the bottom, you’ll typically find them behind the base grille. Remove the grille if necessary.
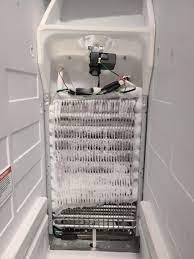
If the coils are located at the back of the fridge, you may need to remove an access panel using a screwdriver. Be sure to keep all screws in a safe place so you can easily reattach the panel.
Using a flashlight, inspect the coils for large debris and gently remove it. Attach the brush attachment to your vacuum cleaner and carefully vacuum the coils. Be gentle to avoid bending the fins or damaging the coils.
For dirt and dust that the vacuum can’t remove, use a coil cleaning brush. These brushes are designed to be flexible and fit into tight spaces, providing a thorough cleaning without damaging the coils.
Once the coils are clean, use the vacuum to clean the area around the coils. This prevents future buildup and maintains the cleanliness of your appliance.
After cleaning, replace any access panels or grilles that you removed. Make sure they are secure to avoid any rattling noises when the fridge is operating.
Once everything is back in place, plug your refrigerator back into the electrical outlet. It’s a good practice to check the settings on your fridge to ensure they are set correctly for optimal performance.
The frequency of cleaning depends on several factors, including the location of the fridge and pet ownership. A good rule of thumb is to clean your Whirlpool fridge coils at least once a year. However, if you have pets or if the fridge is in a high-traffic area, cleaning the coils every six months is advisable.
Cleaning your Whirlpool fridge’s coils is a straightforward task that can lead to significant benefits in terms of efficiency and longevity of your appliance. By following these steps, you ensure that your refrigerator runs as smoothly as possible, keeping your food fresh and your energy bills low. Remember, a little maintenance goes a long way in the world of kitchen appliances. For more tips and tricks on maintaining your appliances, keep reading articles here at TheKitchenApplianceDad.com.