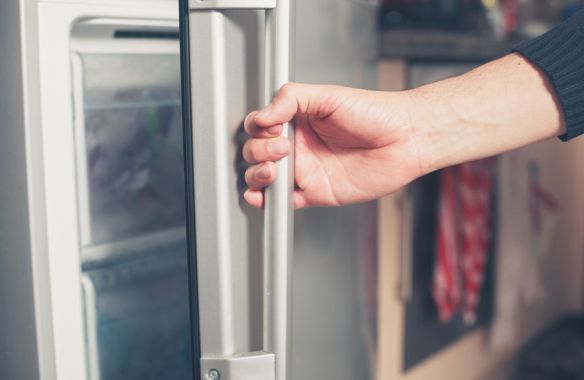
A loose refrigerator door handle can be a minor annoyance that poses a bigger risk than many might anticipate. Not only can it make opening and closing the fridge more cumbersome, but it can also lead to further damage if not addressed promptly. Fortunately, tightening a refrigerator door handle is a straightforward task that can be tackled even by those with minimal DIY experience. At TheKitchenApplianceDad.com, we aim to make your appliance maintenance as simple as possible, so let’s dive into the steps you need to follow to secure that wobbly handle in no time.
Identifying the Type of Handle
Before you can tighten your refrigerator door handle, you must first identify what type of handle is installed on your appliance. The handle type will determine the tools and methods you’ll use to tighten it.

H3: Screw Handles
These handles are attached with visible screws at the top and bottom. They are the most straightforward when it comes to tightening as it usually just requires a screwdriver.
H3: Set Screw Handles
These handles have a set screw (a small, inset screw) that may require an Allen wrench to adjust. These screws are often hidden under a small cap or at the base of the handle.
H3: Snap-On Handles
Some newer models feature snap-on handles that aren’t secured with visible screws. These might require a different approach, such as realigning or snapping the handle back into its designated slots.
Tools Needed
- Flat-head screwdriver: For screws that have a single, flat indentation.
- Phillips-head screwdriver: For screws that have a cross-shaped indentation.
- Allen wrench (also known as a hex key): Needed for set screws.
- Small putty knife or a flat tool: This might be needed to pry open any cap covering the screws on set screw handles.
Make sure you have the correct size tools to avoid damaging the screws or the handle itself.
Step-by-Step Guide to Tighten the Refrigerator Door Handle
Step 1: Prepare Your Workspace
Ensure that your refrigerator is stable and that there’s no risk of the appliance moving while you work. It might be helpful to have someone assist by holding the fridge steady.
Step 2: Identify and Access the Screws
- For Screw Handles: Locate the screws at the top and bottom of the handle. They should be easily visible.
- For Set Screw Handles: Look for a small cap at the top or bottom of the handle. Gently pry this off using a small putty knife or another flat tool. Underneath, you’ll find the set screw.
- For Snap-On Handles: Determine how the handle is attached to the door. Typically, these handles will snap off when pulled with a certain degree of force in the right direction.
Step 3: Tighten the Screws
- For Screw Handles: Use the appropriate screwdriver to tighten the screws. Ensure they are snug but be careful not to overtighten as this can strip the screws.
- For Set Screw Handles: Insert the correct size Allen wrench and tighten the set screw. Again, snug but not overtightened.
- For Snap-On Handles: If the handle is loose due to misalignment, carefully remove the handle and realign it. Snap it back into place, ensuring it fits securely.
Step 4: Test the Handle
Once all screws are tightened or the handle is snapped back into place, test the handle by opening and closing the door several times. The handle should now be secure and stable. If it still wobbles, double-check your work and retighten as necessary.
Tips for Maintenance
- Regularly check the tightness: Every few months, give your refrigerator handles a quick check to ensure they are still tight. This can prevent them from becoming loose over time.
- Be gentle: When opening and closing your refrigerator, use normal force. Overly aggressive handling can cause the screws to loosen more quickly.
- Clean the handles: While checking the screws, take the time to clean the handles with a suitable cleaner to keep them looking their best and free from bacteria and smudges.
Key Takeaways
- Identify the type of handle: Knowing whether you have screw handles, set screw handles, or snap-on handles will dictate the approach and tools needed.
- Gather the right tools: Typically, a screwdriver, Allen wrench, and possibly a small putty knife are necessary.
- Follow the step-by-step guide: Prepare your workspace, access the screws, tighten appropriately, and test the handle.
- Maintain regularly: Check and clean the handles regularly to ensure longevity and functionality.
By following these steps and tips from TheKitchenApplianceDad.com, you can easily maintain the handles on your refrigerator, ensuring they stay functional and secure for years to come. Remember, taking a few minutes to address a loose handle now can save you time and trouble down the### Introduction
A loose refrigerator door handle can be a minor annoyance that poses a bigger risk than many might anticipate. Not only can it make opening and closing the fridge more cumbersome, but it can also lead to further damage if not addressed promptly. Fortunately, tightening a refrigerator door handle is a straightforward task that can be tackled even by those with minimal DIY experience. At TheKitchenApplianceDad.com, we aim to make your appliance maintenance as simple as possible, so let’s dive into the steps you need to follow to secure that wobbly handle in no time.
Identifying the Type of Handle
Before you can tighten your refrigerator door handle, you must first identify what type of handle is installed on your appliance. The handle type will determine the tools and methods you’ll use to tighten it.
Screw Handles
These handles are attached with visible screws at the top and bottom. They are the most straightforward when it comes to tightening as it usually just requires a screwdriver.
Set Screw Handles
These handles have a set screw (a small, inset screw) that may require an Allen wrench to adjust. These screws are often hidden under a small cap or at the base of the handle.
Snap-On Handles
Some newer models feature snap-on handles that aren’t secured with visible screws. These might require a different approach, such as realigning or snapping the handle back into its designated slots.
Tools Needed
- Flat-head screwdriver: For screws that have a single, flat indentation.
- Phillips-head screwdriver: For screws that have a cross-shaped indentation.
- Allen wrench (also known as a hex key): Needed for set screws.
- Small putty knife or a flat tool: This might be needed to pry open any cap covering the screws on set screw handles.
Make sure you have the correct size tools to avoid damaging the screws or the handle itself.
Step-by-Step Guide to Tighten the Refrigerator Door Handle
Step 1: Prepare Your Workspace
Ensure that your refrigerator is stable and that there’s no risk of the appliance moving while you work. It might be helpful to have someone assist by holding the fridge steady.
Step 2: Identify and Access the Screws
- For Screw Handles: Locate the screws at the top and bottom of the handle. They should be easily visible.
- For Set Screw Handles: Look for a small cap at the top or bottom of the handle. Gently pry this off using a small putty knife or another flat tool. Underneath, you’ll find the set screw.
- For Snap-On Handles: Determine how the handle is attached to the door. Typically, these handles will snap off when pulled with a certain degree of force in the right direction.
Step 3: Tighten the Screws
- For Screw Handles: Use the appropriate screwdriver to tighten the screws. Ensure they are snug but be careful not to overtighten as this can strip the screws.
- For Set Screw Handles: Insert the correct size Allen wrench and tighten the set screw. Again, snug but not overtightened.
- For Snap-On Handles: If the handle is loose due to misalignment, carefully remove the handle and realign it. Snap it back into place, ensuring it fits securely.
Step 4: Test the Handle
Once all screws are tightened or the handle is snapped back into place, test the handle by opening and closing the door several times. The handle should now be secure and stable. If it still wobbles, double-check your work and retighten as necessary.
Tips for Maintenance
- Regularly check the tightness: Every few months, give your refrigerator handles a quick check to ensure they are still tight. This can prevent them from becoming loose over time.
- Be gentle: When opening and closing your refrigerator, use normal force. Overly aggressive handling can cause the screws to loosen more quickly.
- Clean the handles: While checking the screws, take the time to clean the handles with a suitable cleaner to keep them looking their best and free from bacteria and smudges.
Key Takeaways
- Identify the type of handle: Knowing whether you have screw handles, set screw handles, or snap-on handles will dictate the approach and tools needed.
- Gather the right tools: Typically, a screwdriver, Allen wrench, and possibly a small putty knife are necessary.
- Follow the step-by-step guide: Prepare your workspace, access the screws, tighten appropriately, and test the handle.
- Maintain regularly: Check and clean the handles regularly to ensure longevity and functionality.
By following these steps and tips from TheKitchenApplianceDad.com, you can easily maintain the handles on your refrigerator, ensuring they stay functional and secure for years to come. Remember, taking a few minutes to address a loose handle now can save you time and trouble down the road.