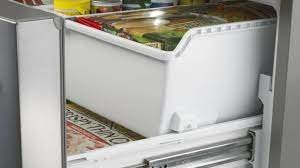
When it comes to maintaining your Whirlpool refrigerator, one of the tasks that might seem minor but is actually quite crucial is removing and cleaning the freezer tray. Over time, the freezer tray can accumulate a lot of frost and food residues that can affect your refrigerator’s efficiency and hygiene. If you’re wondering how to tackle this task, you’re in the right place. Here at TheKitchenApplianceDad.com, we aim to make your appliance maintenance tasks as straightforward as possible. Let’s dive into the step-by-step process of removing and cleaning the freezer tray from a Whirlpool refrigerator.
Safety first! Before you begin, make sure to unplug your refrigerator to avoid any electrical hazards. This also helps prevent any accidental adjustments to the temperature settings while you’re working.
Remove all items from your freezer. This will give you ample space to work and prevent any food from getting in your way or thawing out during the process.
In most Whirlpool models, the freezer tray is located at the bottom of the freezer compartment. It may be a pull-out basket or a solid tray, depending on the model.
If your freezer tray is a pull-out model, it will likely have a simple mechanism allowing it to slide out. Gently pull the tray towards you until it is fully extended. There may be a catch or a lever that you need to release to remove the tray completely. If the tray is fixed, it might be secured with screws or clips. In this case, you will need an appropriate screwdriver to remove these fixtures before you can lift out the tray.

For an effective clean that doesn’t involve harsh chemicals, mix a solution of warm water and mild dish soap. Alternatively, you can use a mixture of water and vinegar for a natural disinfecting action.
Take a soft cloth or sponge and dip it into your cleaning solution. Use this to scrub the surface of the tray, paying special attention to any sticky spills or stains. For tougher stains, you may use a soft-bristled brush to gently scrub the affected areas.
Once you’ve scrubbed the tray, rinse it thoroughly under warm water to remove any soap residue. It’s important to ensure that no cleaning solution remains on the tray as it could contaminate your food.
After rinsing, dry the tray completely with a clean towel or let it air dry. Moisture left on the tray can lead to frost buildup when it is replaced in the freezer.
Once the tray is dry, slide or place it back into its original position in the freezer. Make sure it is properly aligned and secure.
Now that your tray is back in place and clean, you can return your frozen goods to the freezer. This is a good opportunity to organize your items and check if any need to be used soon or thrown away.
To minimize the need for frequent deep cleans, here are a few maintenance tips:
Taking the time to properly remove and clean your freezer tray not only ensures a hygienic environment for your frozen goods but also helps maintain the efficiency of your Whirlpool refrigerator. Remember, a little regular maintenance goes a long way in extending the life of your appliances. Stay tuned to TheKitchenApplianceDad.com for more helpful tips and tricks on managing your kitchen appliances effectively.

