Welcome to another practical guide from TheKitchenApplianceDad.com! Today, we’re diving into a common household task that might seem daunting at first: replacing the seal on your GE freezer. Whether you’ve noticed frost build-up or your freezer seems to be working overtime, replacing a worn-out seal can improve efficiency and save you money on energy costs. Let’s get started with this easy-to-follow guide.
The seal around your freezer door, also known as a gasket, plays a crucial role in maintaining the efficiency of your appliance. It keeps the cold air in and the warm air out. Over time, seals can wear out or become damaged, leading to air leaks. This not only causes your freezer to work harder but can also lead to a significant increase in your energy bills. Moreover, a faulty seal can affect the freshness and preservation of your stored food.
Before you embark on replacing the seal, it’s important to confirm that it’s the root cause of your issues. Here are a few signs that your freezer seal might need replacing:
Replacing a freezer seal is a straightforward DIY task that requires minimal tools. Here’s what you’ll need:
Make sure you have the right seal for your GE freezer model. This information can typically be found in your freezer’s manual or on a label inside the freezer.
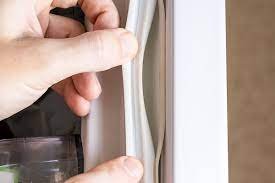
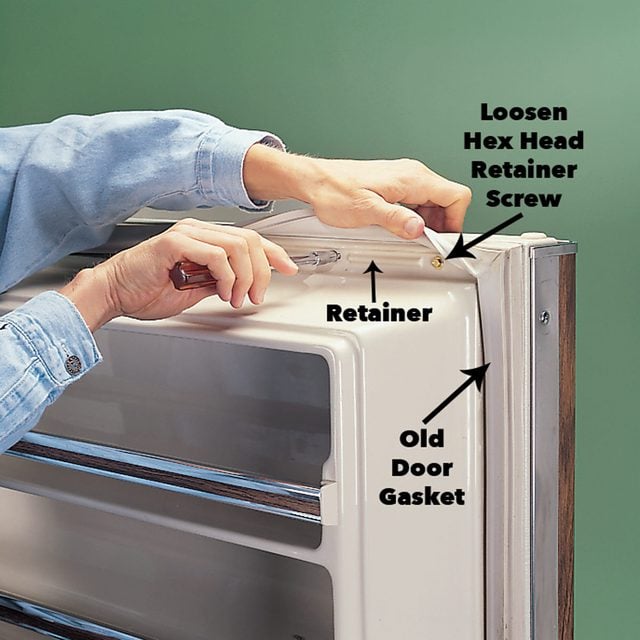
Start by opening the freezer door and gently pulling the seal back. Check for any screws or clips holding the seal in place. Use your screwdriver to remove these carefully. Once all fasteners are removed, you should be able to pull the old seal off completely.
With the old seal removed, it’s a good opportunity to clean the area. Use mild soapy water and a sponge to clean the groove and the door where the seal was located. This will ensure the new seal adheres properly and provides a tight fit. Dry thoroughly with a towel.
Align the new seal with the groove on the door, starting at one corner and working your way around the perimeter of the door. Make sure the seal is flat and even as you press it into the groove. If your model uses screws or clips to secure the seal, replace these as you go.
Once the new seal is in place, close the freezer door and check for any obvious gaps or misalignment. You can test the seal’s effectiveness by closing the door on a slip of paper. If you can pull the paper out easily with the door closed, the seal might not be tight enough.
If the seal isn’t fitting correctly, gently heat it with a hair dryer and stretch it to fit the door. This can help in removing any wrinkles or bends that occurred during shipping or installation.
To extend the life of your new freezer seal and ensure it continues to perform effectively, follow these simple maintenance tips:
Replacing the seal on your GE freezer is a straightforward DIY task that can lead to improved energy efficiency and better food preservation. By following this guide, even beginners can ensure their freezer is in top condition, helping to save on energy costs and avoid unnecessary wear on their appliance. Remember, a little maintenance can go a long way in extending the life of your appliances. For more tips and guides on maintaining your home appliances, keep visiting TheKitchenApplianceDad.com. Happy fixing!