When your Frigidaire freezer starts to develop issues like excessive frost buildup, one of the first components to check is the defrost timer. This small, but crucial part of your freezer controls the intervals of the defrost cycle, ensuring that your appliance remains frost-free and operates efficiently. Over time, the defrost timer can wear out or malfunction, necessitating a replacement. Fortunately, replacing the defrost timer in your Frigidaire freezer is a manageable task that you can undertake with some basic tools and a bit of patience.
In this detailed guide from TheKitchenApplianceDad.com, we’ll walk you through the steps to successfully replace the defrost timer in your Frigidaire freezer. Let’s get started!
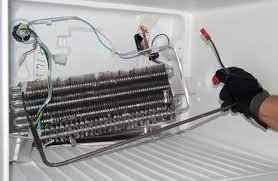
The defrost timer is essentially a clock that controls when your freezer goes into and out of the defrost cycle. Typically, it turns the defrost heater on a few times a day to melt away any frost that has accumulated on the evaporator coils. If this timer is not functioning properly, it can lead to a range of issues, including excessive frost build-up and reduced cooling efficiency.

Safety first! Always unplug your freezer from the electrical outlet before performing any repairs. This prevents any risk of electric shock.
The location of the defrost timer can vary depending on the model of your Frigidaire freezer. It is typically found behind the lower kickplate or back panel of the freezer. Consult your freezer’s manual for the exact location.
Use a screwdriver to remove the screws that hold the panel in place. Once the screws are removed, gently take off the panel to expose the defrost timer.
If you have a multimeter, you can test the defrost timer to confirm it is faulty before replacing it. Set your multimeter to the continuity setting and test the timer according to your freezer’s wiring schematic. If the timer does not show continuity according to the cycles, it needs to be replaced.
Take note of how the old defrost timer is connected before disconnecting it. It is usually secured with a couple of screws and connected with several wires. Remove the screws and gently disconnect the wires. Be sure to remember or note down which wire goes where.
Connect the wires to the new defrost timer following the arrangement of the old one. Secure the timer in place with the screws you previously removed.
Once the new defrost timer is securely in place, reattach the panel you removed earlier and secure it with the screws.
Plug your freezer back into the electrical outlet and turn it on. Monitor the freezer over the next few hours to ensure that it enters and exits the defrost cycle without any issues.
Replacing a defrost timer might initially seem daunting, but with the right tools and a careful approach, it’s a task that you can accomplish with confidence. For more helpful tips and appliance advice, keep following TheKitchenApplianceDad.com. Whether you’re tackling a new repair or upgrading your kitchen technology, we’re here to help guide you through the process smoothly and safely.