how-to-turn-on-a-ninja-blender-a-beginners-guide

How To Turn On A Ninja Blender: A Beginner’s Guide

Welcome to TheKitchenApplianceDad.com, your go-to source for all kitchen appliance know-how! Today, we’re focusing on a common question that pops up among our readers: How do you turn on a Ninja blender? If you’re a beginner in the world of blending and have chosen a Ninja blender for its robust features and reputation for durability, this guide will walk you through the basics of getting your blender up and running.

Unboxing Your Ninja Blender

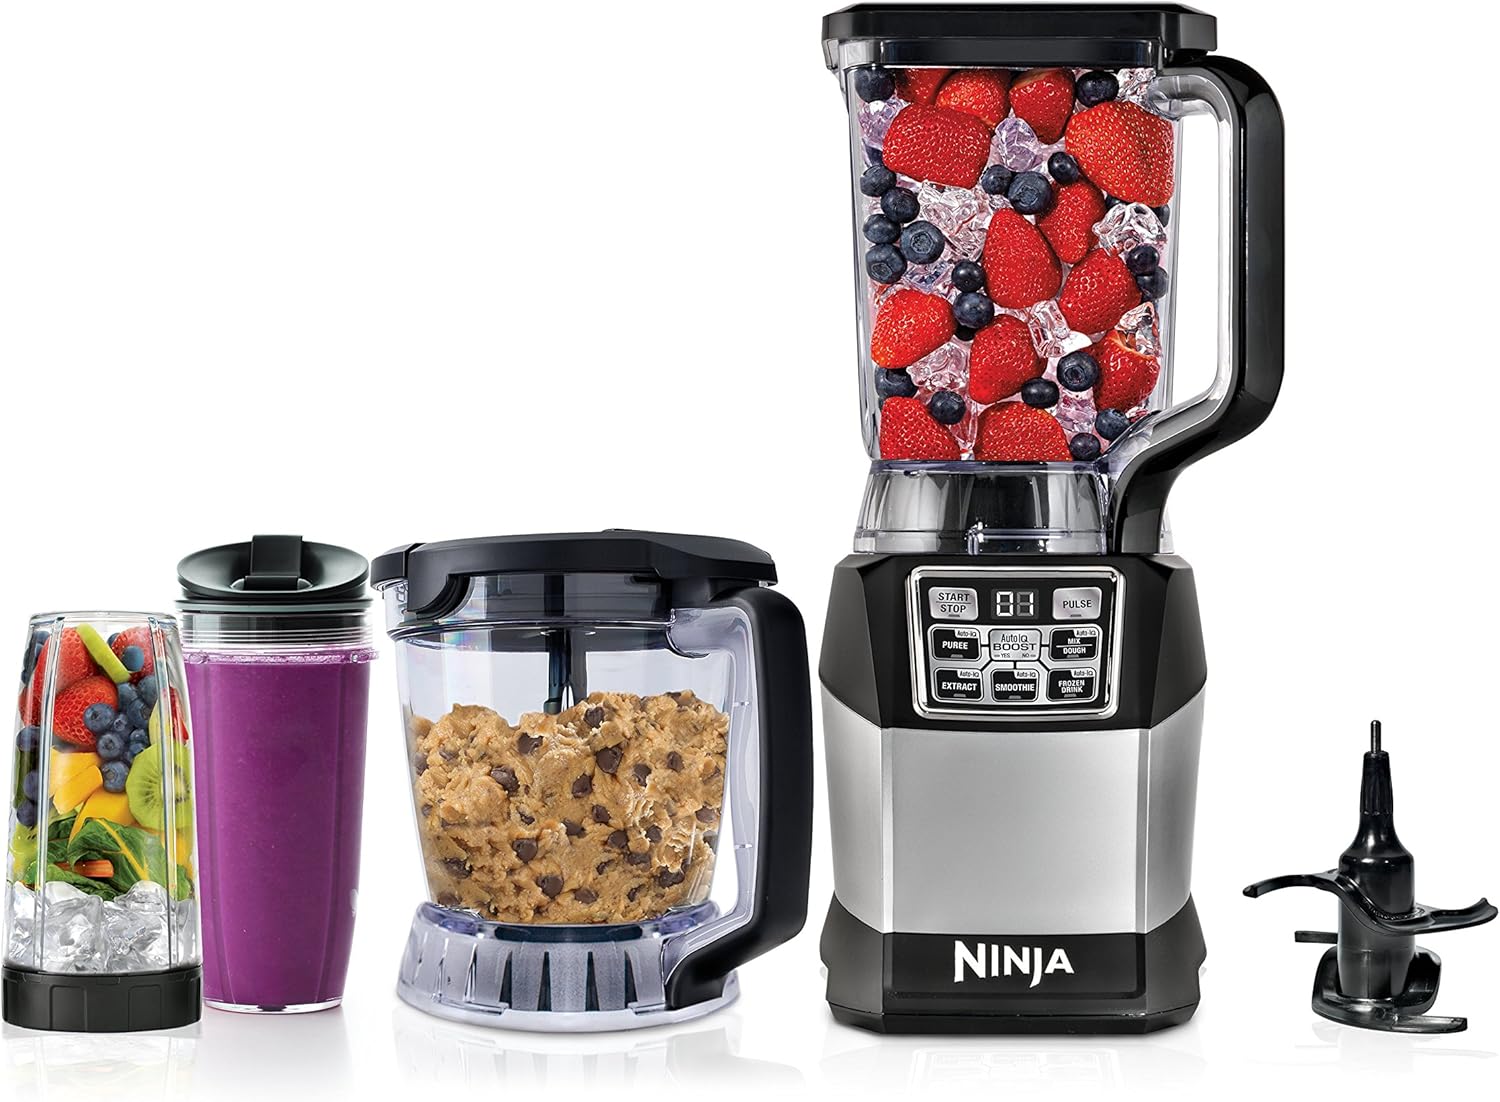
First things first, let’s unpack your Ninja blender. You’ll typically find a few main components inside:

  • Motor Base: The heart of your Ninja blender, where all the power comes from.
  • Blender Pitcher or Cup: Depending on your model, this could be a large pitcher or a personal-sized cup.
  • Lid with Locking Handle: Keeps everything secure while blending.
  • Blade Assembly: Carefully unpack this, as the blades are sharp.

Before we proceed, ensure all parts are clean and dry. Rinse them with warm water and mild detergent if necessary, then let them air dry.

Top 9+ Best Ninja Blender for Smoothies & Juicing Reviews

Plugging In Your Ninja Blender

Locate a suitable power outlet in your kitchen—one that’s close enough to where you want to blend without having to use an extension cord. Ninja blenders are designed to plug directly into a wall outlet. Once you’ve found the perfect spot, plug in the motor base and you’re halfway there.

Assembling Your Ninja Blender

With the Ninja blender, it’s crucial to assemble the components correctly to ensure it functions properly:

  1. Blade Assembly: Place the blade assembly onto the gear at the bottom of the pitcher or cup.
  2. Attaching Pitcher/Cup to Base: Align the pitcher or cup on the motor base. Depending on the model, you might have to twist it slightly until it clicks into place or simply drop it in for models with a vertical lock system.
  3. Securing the Lid: Make sure the lid is securely fastened. Some Ninja models have a handle that you need to click into place.

Understanding Your Ninja Blender’s Controls

Ninja blenders come with various control panels, depending on the model. Here’s what you might encounter:

  • Power Button: This is the button that turns your blender on and off. It might be labeled with a power icon or simply “power.”
  • Speed Buttons: These buttons control the speed of the blender. They might be labeled “low,” “medium,” “high,” or with specific functions like “pulse,” “crush,” or “blend.”
  • Programmed Settings: Higher-end models may have pre-programmed settings for specific tasks, like making smoothies or dough.

Turning On Your Ninja Blender

Now comes the moment of truth—turning on your Ninja blender. Follow these steps:

  1. Power Up: Press the power button to turn on the blender. The power light should illuminate, indicating that the blender is ready to go.
  2. Select Speed/Program: Choose a speed setting or a pre-programmed setting that suits your blending needs.
  3. Start Blending: With everything in place and your chosen setting activated, you’re ready to blend. If your model has a “start” button, press it now; otherwise, the blender will start as soon as you select a speed or program.

Safety First

Ninja blenders are designed with safety features that prevent the motor from running if the pitcher or cup and lid are not properly attached. If your blender doesn’t start, double-check that everything is locked into place. Also, never put your hands near the blades when the blender is plugged in.

Troubleshooting Tips

If you encounter issues while trying to turn on your Ninja blender, consider these tips:

  • Check the Outlet: Make sure the outlet is functioning by plugging in another appliance.
  • Inspect Assembly: Revisit the assembly steps to ensure everything is correctly in place.
  • Consult the Manual: Refer to your Ninja blender’s user manual for specific troubleshooting guidance.

Key Takeaways

  • Proper Setup: Ensure all parts are clean, dry, and correctly assembled.
  • Plugging In: Connect your Ninja blender directly to a wall outlet.
  • Control Familiarity: Understand the buttons and settings on your model.
  • Safety Checks: Ensure the lid is securely fastened and the pitcher or cup is properly attached.
  • Troubleshooting: Follow simple checks if the blender doesn’t start.

By following this beginner’s guide, you should now be able to turn on and use your Ninja blender with confidence. Remember to always handle the blades with care and never bypass the safety features built into your appliance. Whether you’re blending a smoothie, pureeing soup, or crushing ice, your Ninja blender is a versatile tool that can handle a variety of culinary tasks.

For more guides and tips on using your kitchen appliances to their fullest potential, keep visiting usat TheKitchenApplianceDad.com. We’re here to help you navigate the world of kitchen gadgets and appliances with ease. Enjoy your blending journey with Ninja, and feel free to reach out with any questions or for more advice on getting the most out of your kitchen tools. Happy blending!

For more details on Ninja blenders or any other kitchen appliance guidance, be sure to check out our comprehensive reviews and articles right here on TheKitchenApplianceDad.com. Whether you’re a beginner in the kitchen or a seasoned chef, we have the insights to help elevate your cooking game.

Meet

Dale

Hi, I'm Dale! With over ten years in high volume restaurants, my journey has taken me through the ins and outs of using, maintaining, and even repairing virtually every kitchen appliance imaginable.

I'm here to share simple, straightforward advice to help you choose and use your kitchen tools effectively. No fluff, just the essential info you need to cook up a storm.