Welcome back to TheKitchenApplianceDad.com! With the sun shining brighter and the days getting warmer, it’s the perfect time to discuss a frosty favorite: snow cones. If you’ve ever wondered how to transform your Ninja blender into a snow cone-making wizard, you’re in luck. Today, we’re taking a closer look at how you can cool down and enjoy a classic treat right from the comfort of your home.
The Ninja Blender: A Versatile Tool for Snow Cones
Ninja blenders are known for their ability to crush ice into perfect, fluffy snow – an essential component of any good snow cone. These blenders come with powerful motors and specially designed blades that can tackle the challenge of turning ice cubes into fine, snow-like consistency.

Choosing the Right Ninja Blender Model
Before we dive into the snow cone-making process, it’s important to select a Ninja blender model that’s up for the task. Here are a few models that are particularly adept at crushing ice:
- Ninja Professional Blender (BL610): A popular choice with a 1000-watt motor, this blender can easily crush ice.
- Ninja Professional Plus Blender with Auto-iQ (BN701): This model offers a 1400-watt motor and pre-programmed settings for ice crushing.
- Ninja Foodi Power Pitcher System (SS201): This system includes a powerful motor and a Power Pitcher that’s designed for ice crushing.
These models have the power necessary to give you that perfect snow-like ice for your cones.
Ingredients and Supplies for Making Snow Cones
Before you start, gather the following ingredients and supplies:
- Ice cubes (preferably made from filtered water for a better taste)
- Snow cone syrup (store-bought or homemade)
- Snow cone cups or small paper cups
- Spoon or scoop for serving
Step-by-Step Guide to Making Snow Cones
Now, let’s get to the fun part: making snow cones!
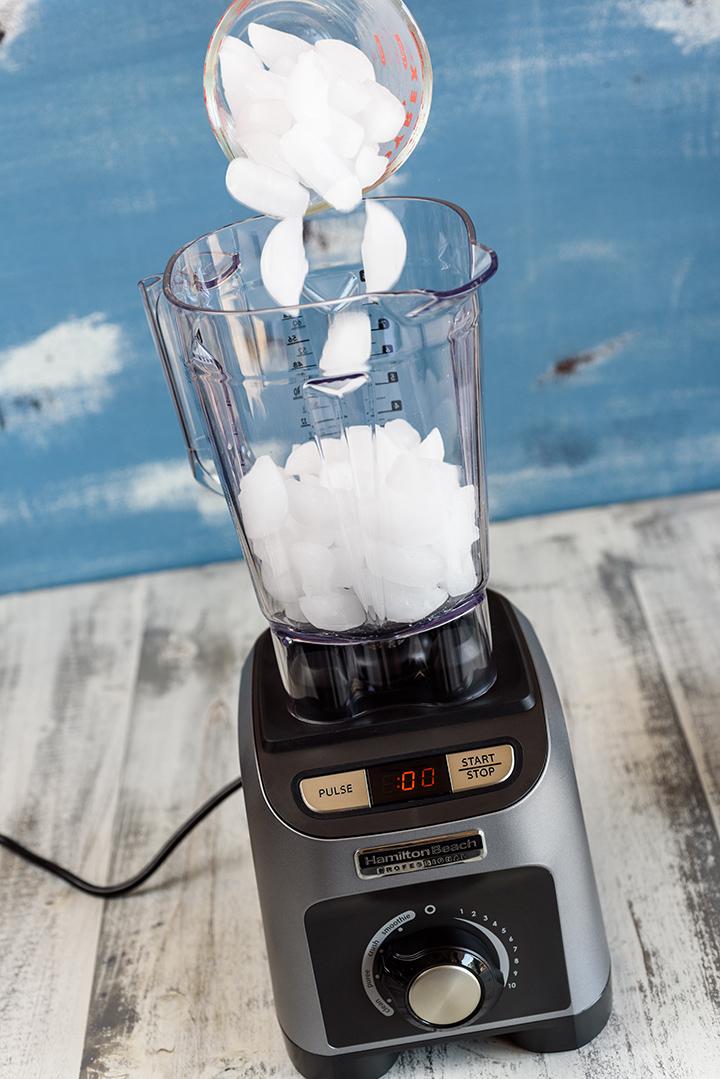
- Prepare the Ice: For the best texture, use ice cubes that are fresh and not clumped together. If necessary, break apart any clumps before blending.
- Add Ice to the Blender: Fill the blender pitcher with ice cubes. Don’t overfill; leave a little room at the top for the ice to move around.
- Pulse to Crush: Secure the lid and use the pulse function to start crushing the ice. The pulse technique allows the ice to settle between bursts, giving you more even results.
- Check Consistency: After several pulses, check the consistency of the ice. If you see any large chunks, continue to pulse until you achieve a fluffy, snow-like consistency.
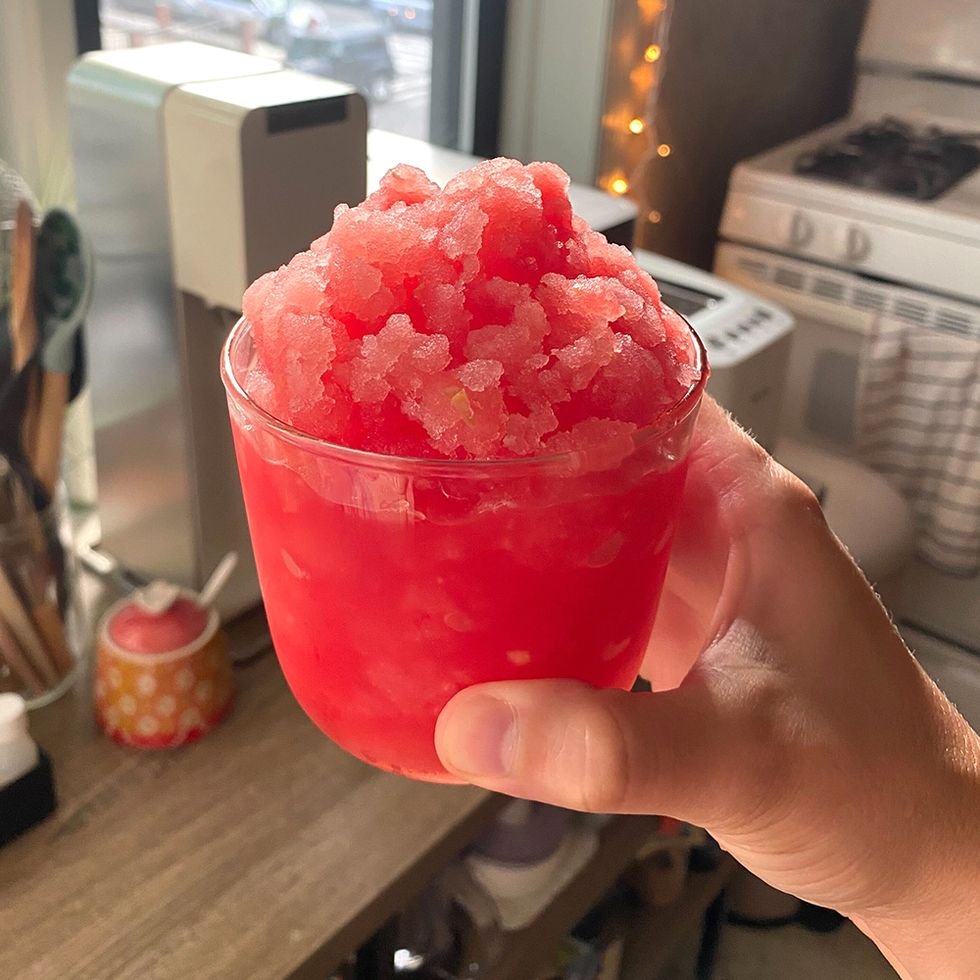
- Serve Immediately: Scoop the crushed ice into your snow cone cups, pressing lightly to compact the ice.
- Add Syrup: Drizzle your favorite snow cone syrup over the top of the ice. Make sure to pour evenly to distribute the flavor throughout the ice.
- Enjoy!: Serve the snow cones immediately with a spoon or straw, and enjoy the refreshing treat!
Tips for Perfect Snow Cones Every Time
- Chill Your Cups: For an extra touch of coolness, chill your snow cone cups in the freezer before serving.
- Syrup Selection: Experiment with different syrup flavors to find your perfect combination. You can even layer multiple syrups for a rainbow effect.
- Homemade Syrups: Consider making your own syrup using fruit juice, sugar, and water for a more natural option.
- Consistency Matters: Don’t blend the ice for too long, or you’ll end up with a slushy texture instead of the desired snow-like consistency.
Maintaining Your Ninja Blender After Use
After creating your snow cones, it’s essential to care for your Ninja blender properly:
- Immediate Cleaning: Rinse the blender pitcher and blades with warm water to remove any leftover ice particles.
- Thorough Washing: Wash the pitcher and blades with dish soap and warm water, or place them in the dishwasher if they’re dishwasher-safe.
- Dry Thoroughly: Make sure all parts are completely dry before reassembling to prevent any water spots or buildup.
Conclusion
Making snow cones with a Ninja blender is a quick and delightful way to beat the heat and bring a smile to everyone’s face. By following these simple steps and tips, you can enjoy this icy treat anytime the craving strikes.
Key Takeaways
- Select the Right Blender: Ensure you have a Ninja blender model with enough power to crush ice effectively.
- Prepare Ingredients: Gather ice cubes, syrup, and cups before starting.
- Pulse to Crush Ice: Use the pulse function to crush the ice until it reaches a snow-like consistency.
- Serve Immediately: Assemble your snow cones quickly to prevent melting.
- Experiment with Flavors: Try different syrups andcombinations to customize your snow cone experience.
- Proper Maintenance: Clean and dry your blender thoroughly after use to keep it in top condition.
Snow cones are more than just a dessert; they’re a fun and frosty experience that can transport you back to childhood summers or help you make new memories with family and friends. And with a Ninja blender in your kitchen arsenal, you’re always just a few minutes away from snow cone perfection.
Thank you for chilling with me today at TheKitchenApplianceDad.com. Whether you’re blending, crushing, or chilling, we aim to help you unleash the full potential of your kitchen appliances. Stay cool, and let your culinary creativity snowball into something spectacular!