Blenders are a staple in many kitchens, and the Ninja blender is known for its powerful performance and sharp blades. Over time, however, even the best blades can become dull, leading to less efficient blending and frustration in the kitchen. At TheKitchenApplianceDad.com, we understand the importance of maintaining your appliances, so let’s dive into how to sharpen the blades on your Ninja blender.
Understand the Ninja Blender Blades
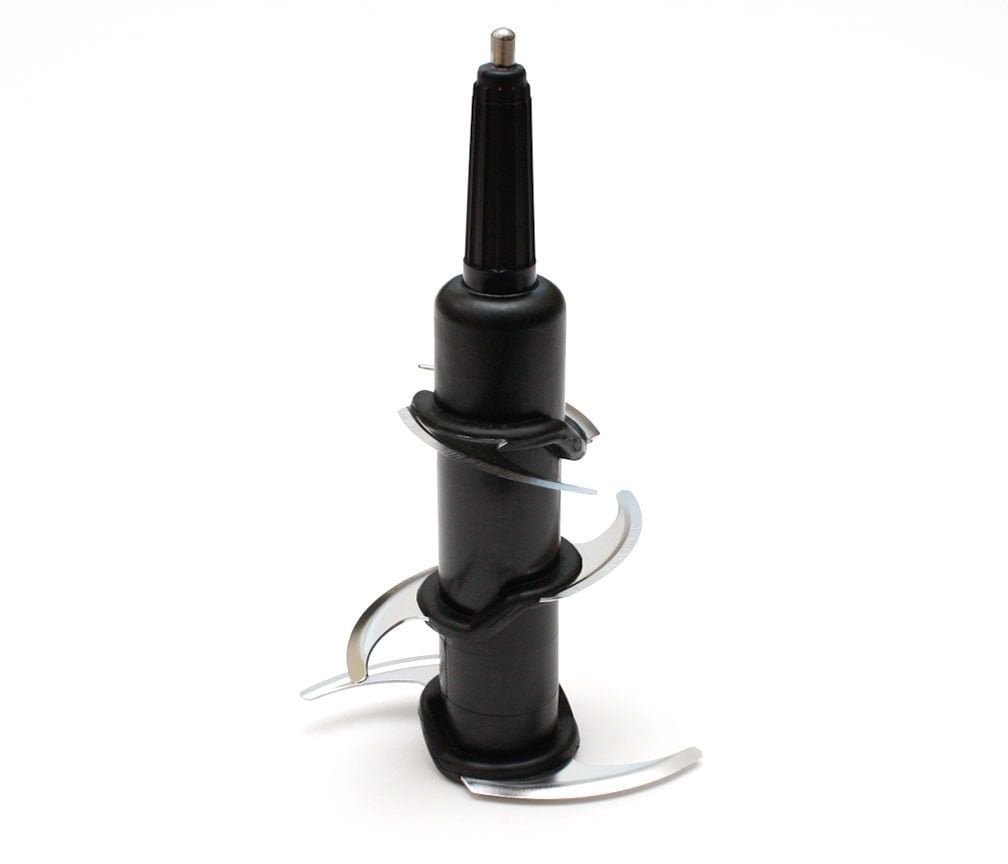
Before attempting to sharpen the blades of your Ninja blender, it’s important to understand their design. Ninja blender blades are unique because they are not just at the bottom of the jar; they are also stacked in the middle, allowing for more efficient blending. They are made from high-quality stainless steel and are designed to be long-lasting.

Assessing the Need for Sharpening
Signs of Dull Blades:
- Your blender is struggling to process foods it once handled easily.
- Smoothies or blended items are chunkier than usual.
- You notice increased blending times.
If you notice any of these signs, it may be time to sharpen your Ninja blender blades.
Safety First: Preparing to Sharpen Ninja Blender Blades
Safety is paramount when handling sharp objects. Before you begin, ensure the blender is unplugged and disassembled.
- Unplug the Blender: This eliminates any risk of accidental activation.
- Disassemble: Carefully remove the blade assembly from the blender pitcher.
Sharpening Ninja Blender Blades
Manual Sharpening with a Sharpening Stone
- Choose a Sharpening Stone: A good quality whetstone or sharpening stone is essential for manual sharpening.
- Prepare the Stone: Some stones require oil or water. Read the manufacturer’s instructions for your stone to prepare it properly.
- Sharpen the Blades: Hold the blade at the appropriate angle to the stone and swipe it across the stone in a smooth motion. Repeat this process several times for each blade, maintaining the same angle throughout.
- Test the Sharpness: Carefully test the sharpness of the blade. If it’s not as sharp as desired, repeat the sharpening process.
Using a Sharpening Rod
- Choose a Sharpening Rod: These rods can be easier to handle, especially for serrated or smaller blades.
- Sharpen the Blades: Run the rod along each edge of the blade, maintaining consistent pressure and angle.
Knife Sharpener
- Choose a Knife Sharpener: A handheld knife sharpener can also be used, but make sure it’s suitable for the blade type.
- Sharpen the Blades: Run the blade through the knife sharpener as per the sharpener’s instructions.
Professional Sharpening
If you are uncomfortable sharpening the blades yourself or want to ensure the job is done to the highest standard, consider taking the blades to a professional.
After Sharpening: Cleaning and Reassembling
After sharpening, it’s important to clean the blades to remove any metal filings and residue.
- Clean the Blades: Wash the blades carefully with warm, soapy water. Be cautious to avoid injury.
- Dry Thoroughly: Dry the blades completely to prevent rust.
- Reassemble the Blender: Once the blades are dry, reassemble the blender carefully.
Maintaining Sharpness
Keeping your Ninja blender blades sharp doesn’t end with sharpening. Here are some tips to maintain the sharpness:
- Avoid Blending Hard Objects: Ice or very fibrous materials can dull blades quicker.
- Regular Cleaning: Ensure blades are cleaned after each use to maintain their condition.
- Proper Use: Overloading the blender or using it for non-recommended items can damage the blades.
When to Replace Ninja Blender Blades
Despite best efforts to maintain and sharpen blades, there will come a time when they need to be replaced.
Look for these indicators:
- Noticeable Damage: If there are chips or bends in the blade.
- Persistent Dullness: If sharpening doesn’t restore performance.
- Unusual Noises: If the blender makes strange noises during operation.
Replacement blades for Ninja blenders can be purchased from the manufacturer or authorized retailers.
Conclusion: Keeping Your Ninja Blender at Peak Performance
Regular maintenance, including sharpening the blades of your Ninja blender, will help you keep your appliance in top condition, ensuring smooth, efficient blending every time. Let’s recap the key points for keeping those blades sharp:
Key Takeaways
- Assess your Ninja blender blades regularly for signs of dullness.
- Always prioritize safety by unplugging and disassembling the blender before sharpening the blades.
- Explore different sharpening methods, such as a sharpening stone, rod, or knife sharpener, or opt for professional sharpening.
- Clean and dry the blades thoroughly after sharpening and before reassembling the blender.
- Maintain the sharpness of your Ninja blender blades by avoiding hard objects, cleaning regularly, and using the blender properly.
- Recognize when it’s time to replace the blades, looking for signs of damage or persistent dullness.
By following this guide, not only will you extend the life of your Ninja blender, but you’ll also ensure that each blend is as perfect as the first. Remember, a well-maintained blender is a cornerstone of a functional kitchen, and at TheKitchenApplianceDad.com, we’re here to help you make the most out of your beloved appliances. Keep blending, and stay sharp!


